Heirloom Tomato Tart
This post contains links to affiliate websites, such as Amazon, and we receive an affiliate commission for any purchases made by you using these links. We appreciate your support!
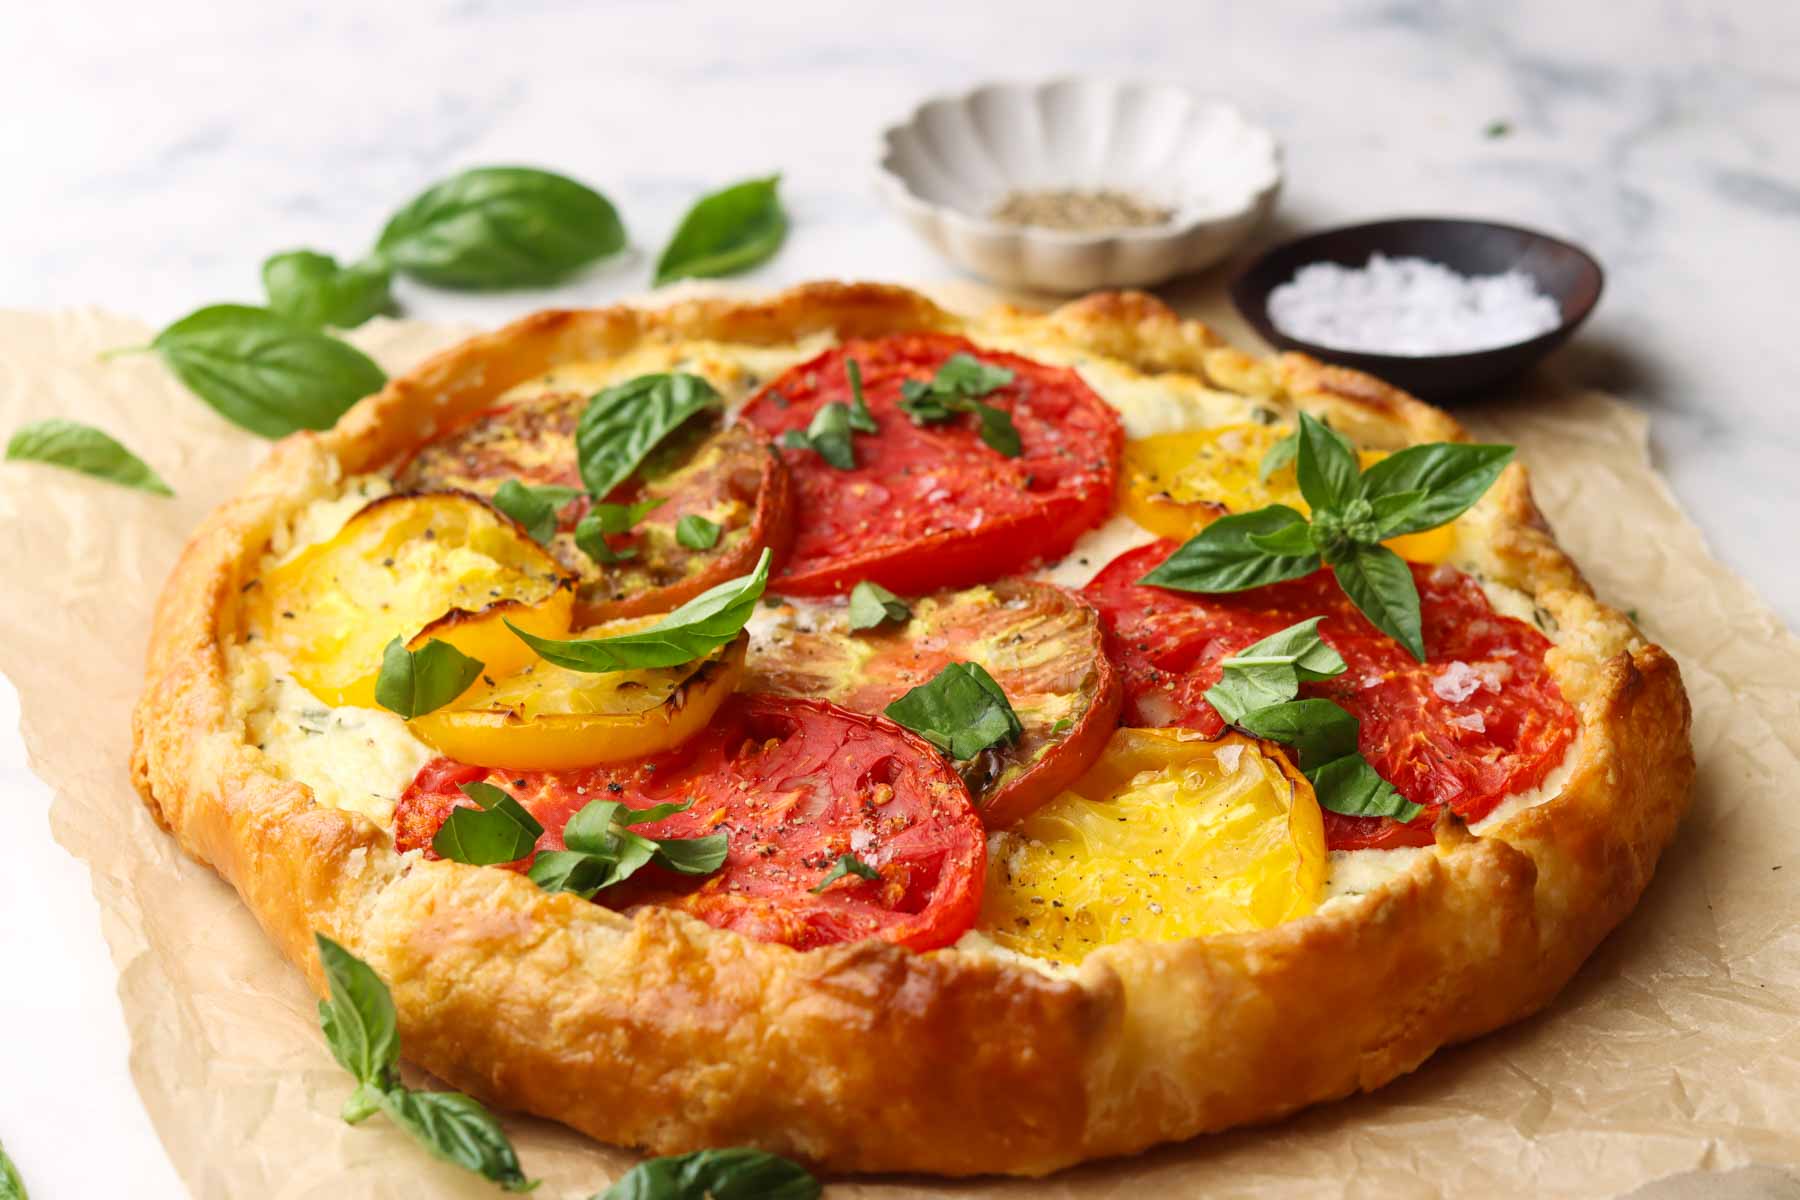
An easy buttery homemade crust, creamy herbed ricotta, and juicy heirloom tomatoes come together in this rustic heirloom tomato tart. It’s fresh, vibrant, and perfect for brunch, lunch, or a light dinner.

Every summer, I hit a point where I start putting those beautiful summer tomatoes on everything. Between the salsa, the salads, and all the pastas, it’s a full-on seasonal obsession – and I have no plans to stop.
This heirloom tomato tart is my latest excuse to keep the tomato streak going. It’s a little rustic, a little fancy, and a great way to show off those big, colorful heirlooms that start showing up at the farmer’s market mid-summer (or late summer in my case, sigh.).
If you haven’t cooked with heirloom tomatoes before, they are old-school varieties grown for flavor—not shelf life. They come in all kinds of shapes, colors, and sizes, and they’re often a little quirky-looking (in the best way). What they lack in uniformity, they more than make up for in juicy texture and deep, sweet-tart tomato flavor.
It’s actually the first time I’ve really given heirloom tomatoes their own moment on this site, even though we enjoy them every summer, for as long as they’re around. They’re sweet, juicy, and come in all those gorgeous colors that make everything look instantly fancy – even if the whole thing only took 15 minutes of hands-on time.
If you’ve made my zucchini tomato tart before, this one has a similar vibe – flaky crust, creamy filling – but with a different flavor profile. It’s the kind of recipe that’s just begging to be eaten outside with a glass of something cold.
Why You’ll Love This Recipe
The crust is flexible and easy: This homemade pie dough is the go-to I’ve been making for decades. It’s buttery, flaky, and foolproof, and I highly recommend it. But if you’re short on time, store-bought dough or frozen puff pastry works beautifully too (I do this in my mushroom tart and it’s always a hit).
A perfect balance of flavors: Between the creamy ricotta, herby filling, and juicy tomatoes, every bite has that sweet-salty-tangy thing going on. Add a little cracked black pepper on top, and it’s chef’s kiss.

It looks way fancier than it is: All those vibrant heirloom tomato slices on top of a golden brown crust make this feel kind of special – even if you’re just eating it on the couch.
Easy to prep ahead: The dough and filling can be made in advance, and leftovers are just as good the next day, maybe even better.
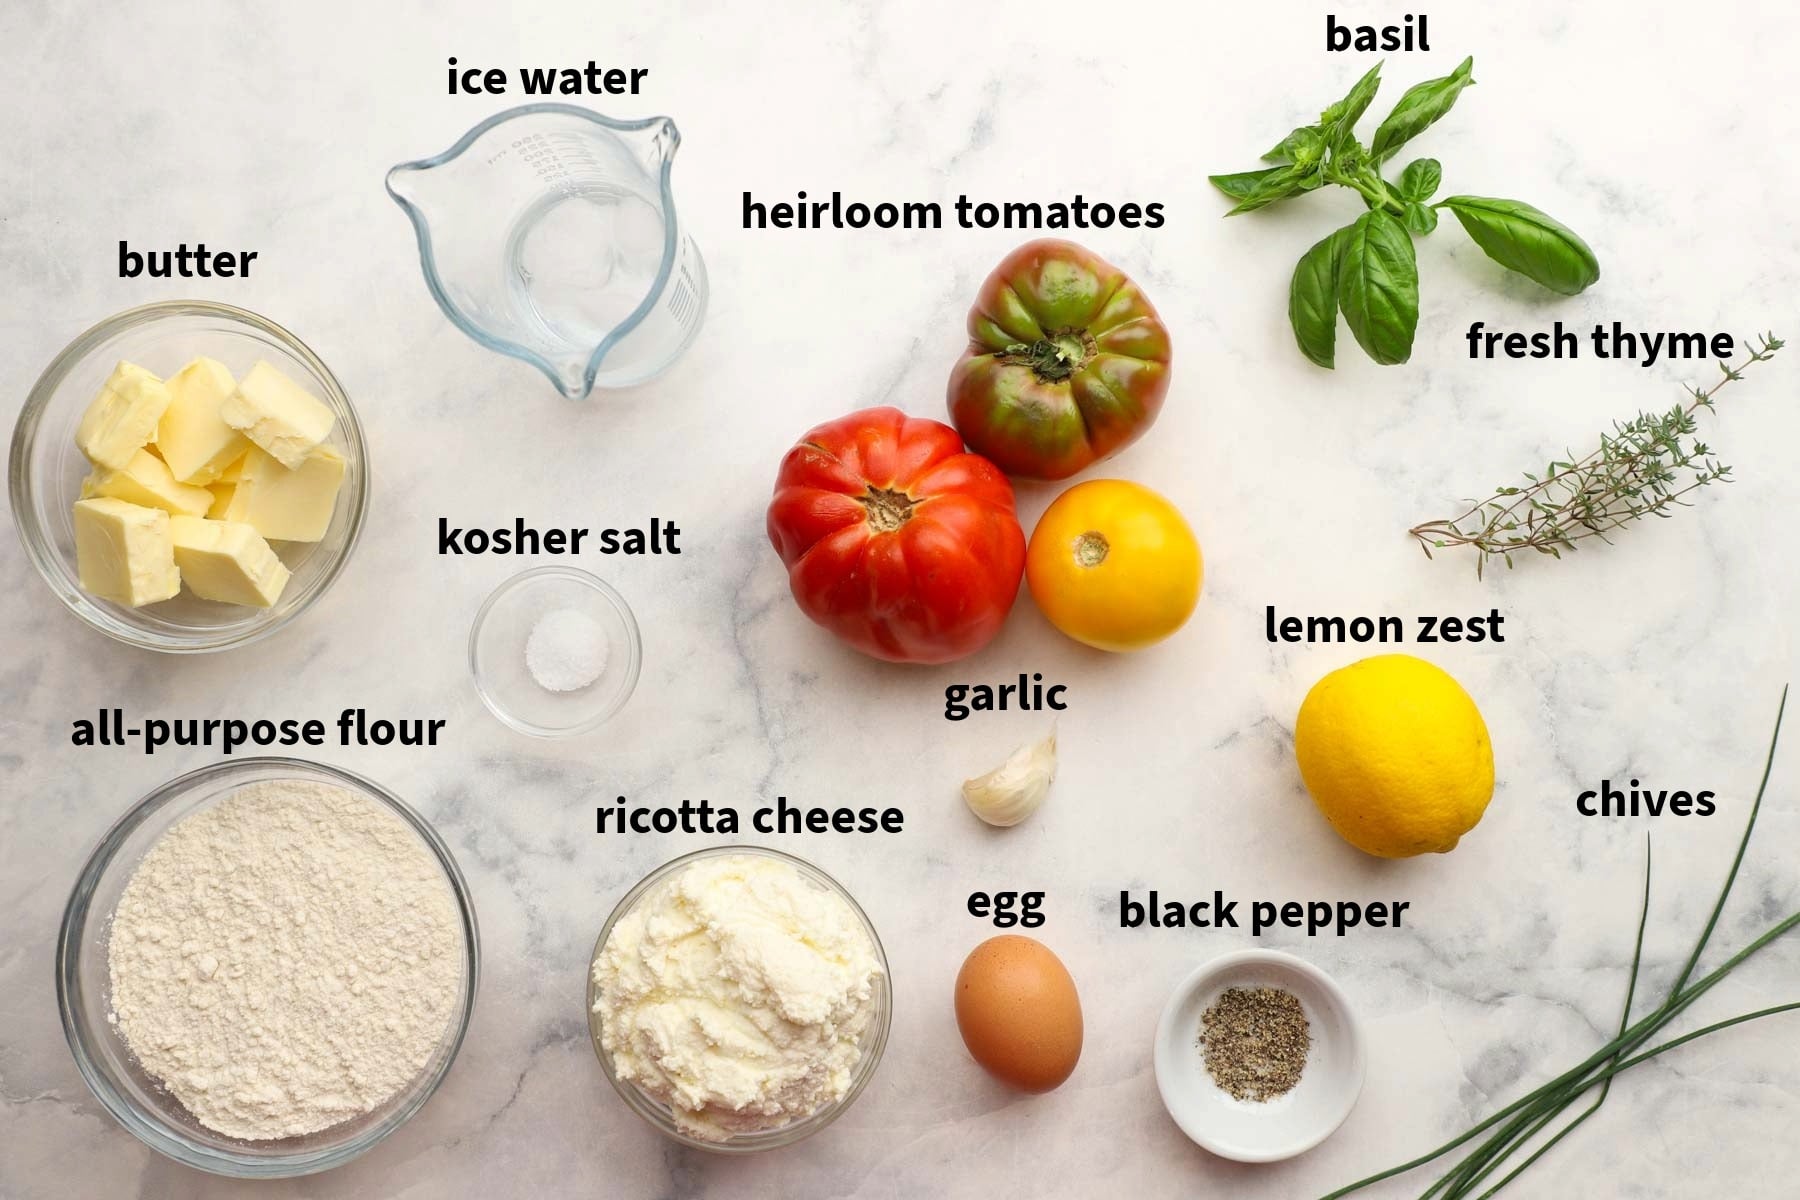
Ingredient Notes
For the Dough
The dough just needs 4 basic ingredients – all-purpose flour, salt, cold butter, and ice water! Make sure everything is very cold – like straight-from-the-fridge cold.
If this is your first time making pie dough, my easy pie crust recipe has great tips for a buttery, flaky tart every time!
For the Filling
Ricotta cheese
Go for full-fat ricotta if you can – it’s rich, creamy, and makes the perfect herby base.
Garlic
One small clove of fresh garlic, finely grated or minced, is perfect.
Fresh basil
A little chopped basil goes into the filling for flavor, and the rest gets sliced thin and sprinkled on top for that perfect fresh finish.
Chives
They add a gentle oniony flavor that pairs beautifully with the creamy ricotta. You can also use the greens of a spring onion if you don’t have chives!
Thyme
A little fresh thyme brings an earthy brightness that makes this tart feel fancy without trying too hard.
Lemon zest
This is one of those tiny additions that makes a big difference. It adds a subtle lift and makes your heirloom tomato tart feel extra summery.
Heirloom tomatoes
These gorgeous, multicolored tomatoes are the showstopper of this tart. Depending on their size, one pound might be just two tomatoes. Slice them about ¼ inch thick so they soften perfectly in the oven without getting too mushy.
Egg
Just one egg, whisked up for brushing the crust before baking. It helps the edges of your heirloom tomato tart turn that beautiful golden color.
Don’t forget to watch the video!
Most of my recipes include a short step-by-step video tutorial. Just scroll down to the recipe card, or use the “Jump to Video” button at the top of the post!
Step-by-Step Instructions
Make the Dough
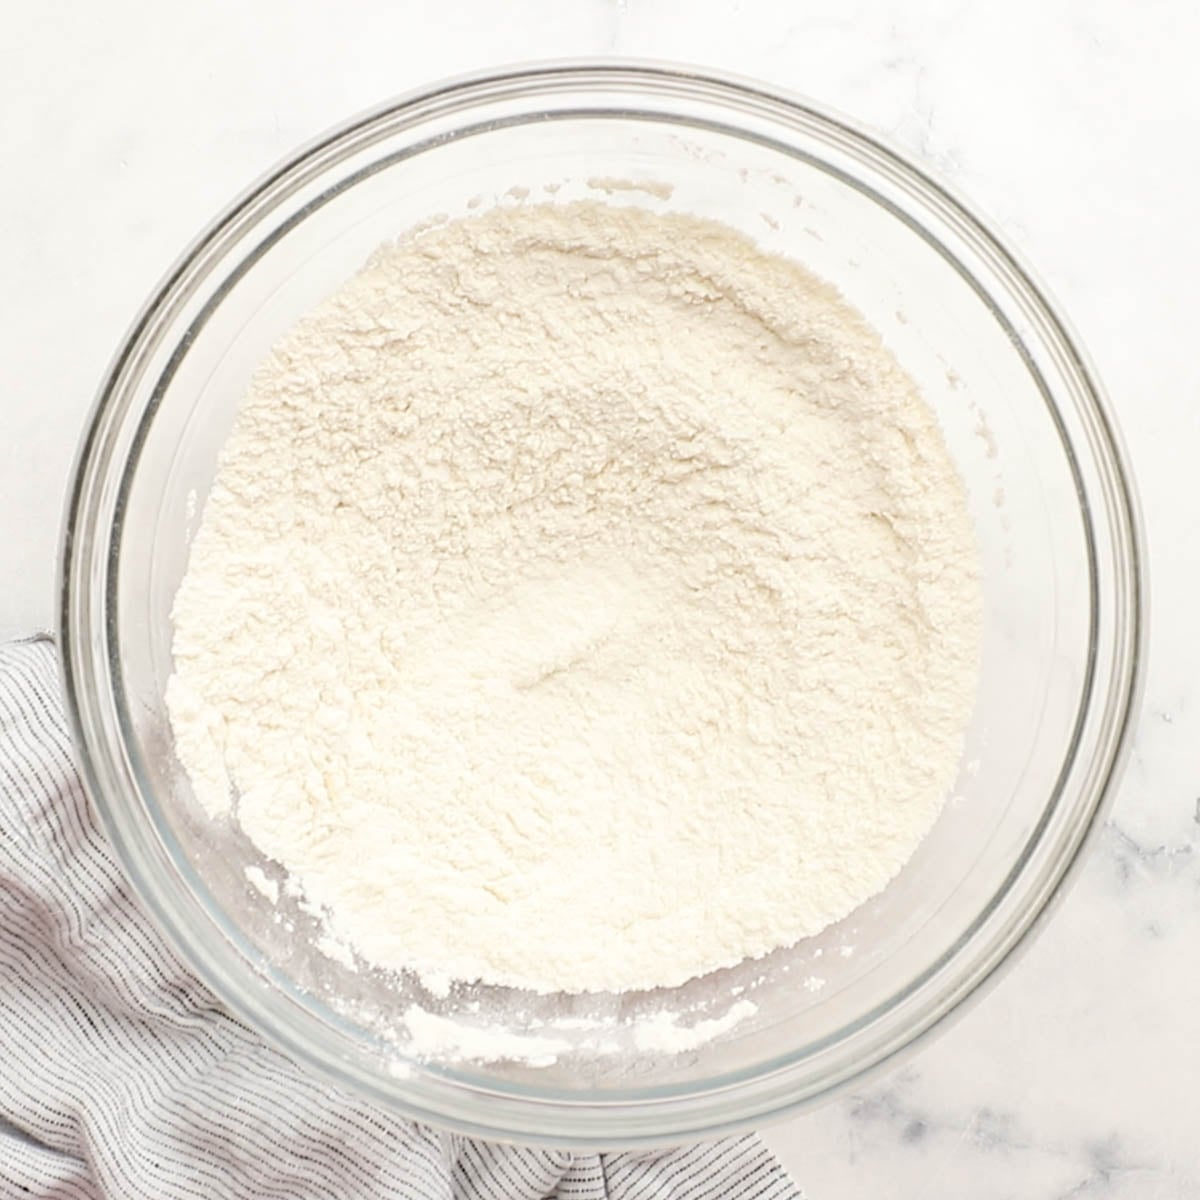
- In a large mixing bowl, whisk together the flour and salt until combined.
Want to SAVE this recipe?
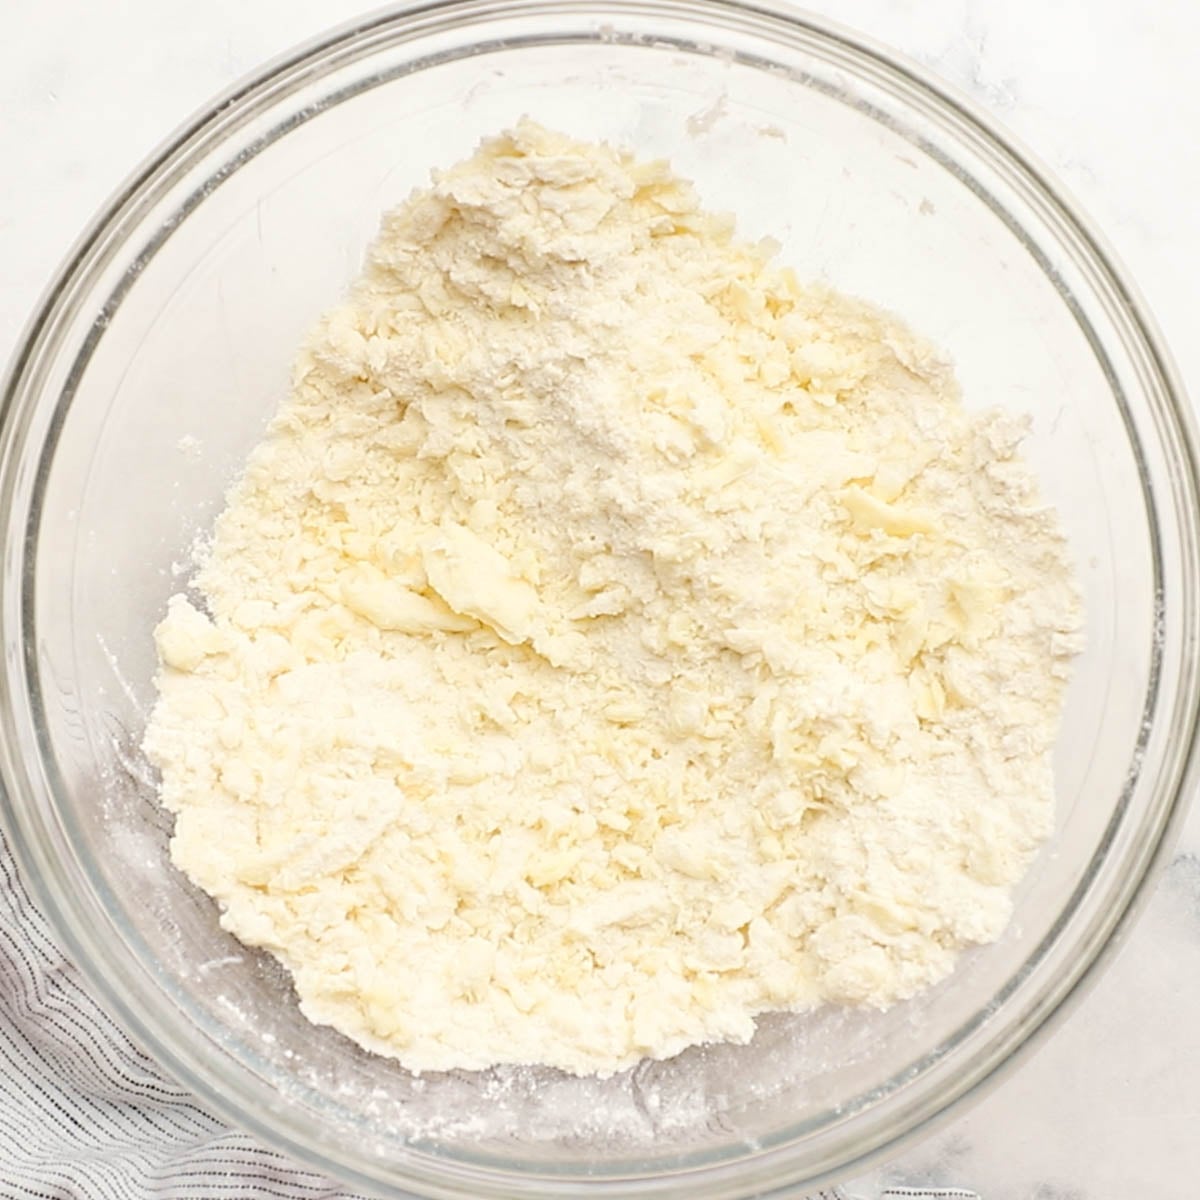
- Cut the cold, cubed butter into the flour using your fingertips, a pastry cutter, or two knives, until the mixture resembles coarse crumbs with some pea-sized bits of butter.

- Gradually stir in the ice water a couple of tablespoons at a time, mixing gently with a wooden spoon after each addition. Stop once the dough begins to come together and can be shaped into a ball – avoid adding too much water. It should not feel sticky or wet.

- Form the dough into a smooth disk and wrap it tightly in plastic wrap. Press in the sides a bit to help prevent cracking when it’s time to roll it out.

- Refrigerate for at least one hour before using.
Make the Filling & Assemble the Tart
- Preheat your oven to 400°F and position the rack in the center.
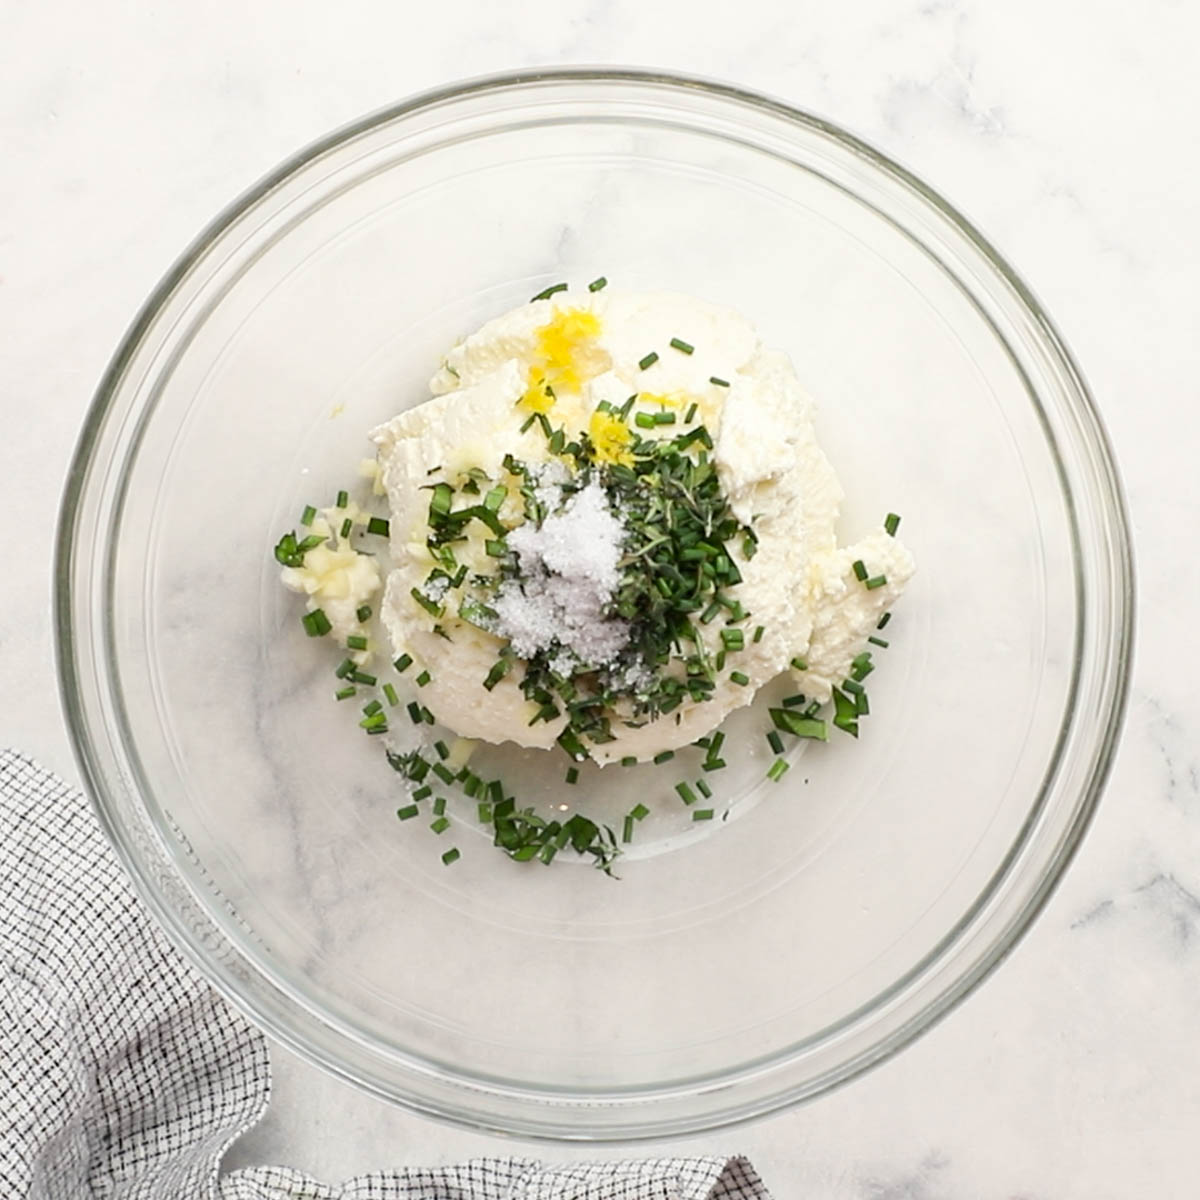
- In a medium bowl, stir together the ricotta, garlic, chopped basil, chives, thyme, lemon zest, and ½ teaspoon of salt.

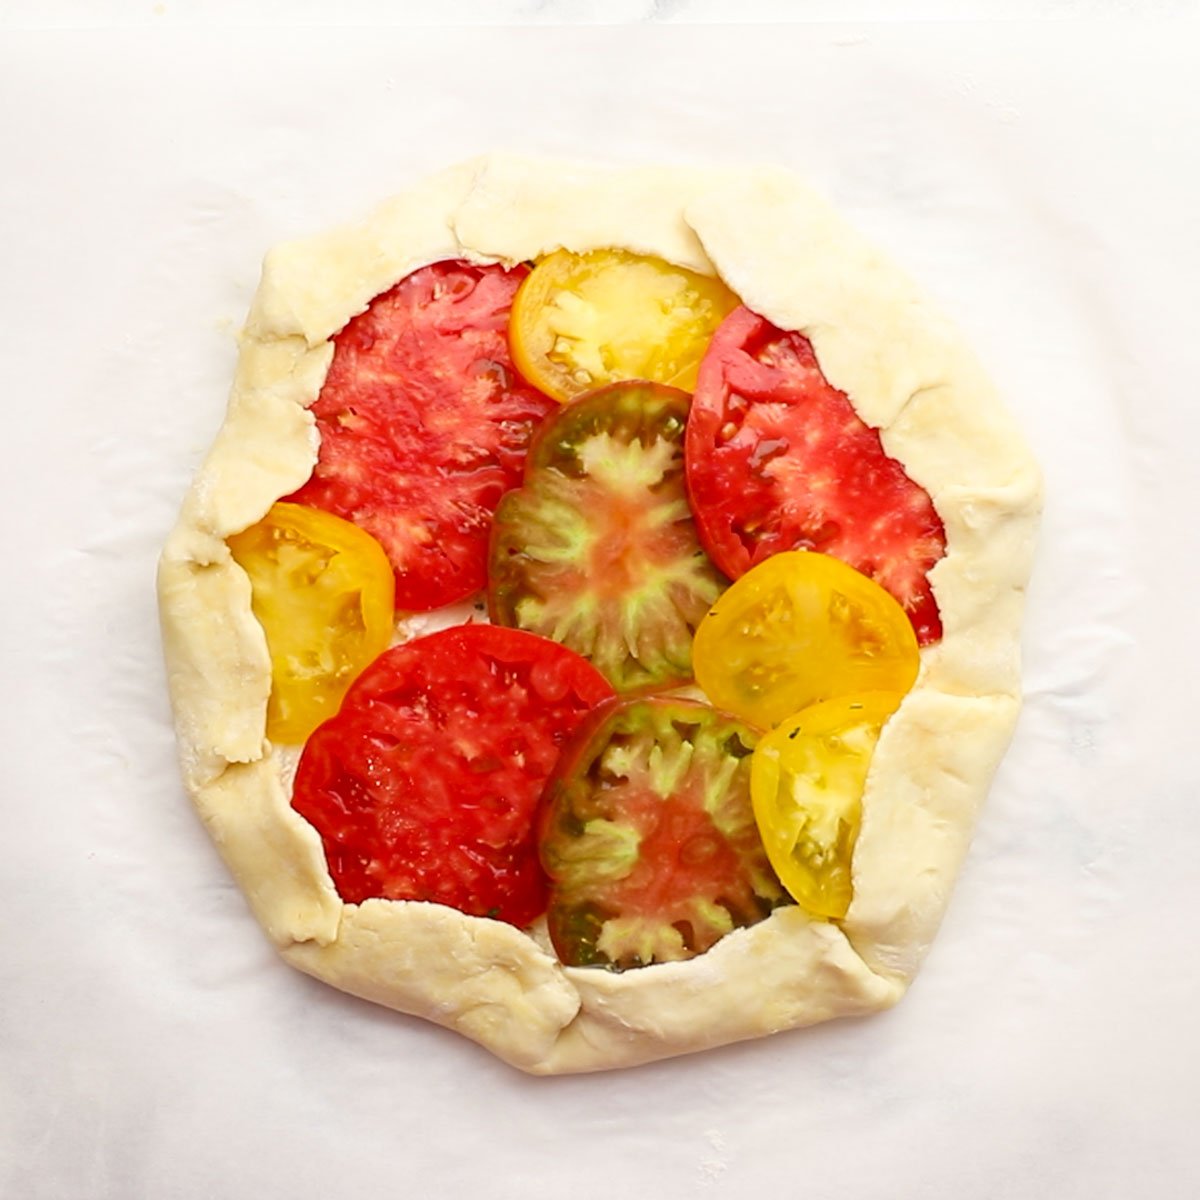
- Roll the chilled dough out on a sheet of parchment paper trimmed to fit a baking sheet. Lightly flour the top of the dough and roll it into a 12-inch circle. Spread the ricotta mixture over the dough, leaving about a 1-inch border around the edges.

- Layer the tomato slices over the filling, then fold the edges of the dough up and over the filling.

- Carefully slide the parchment paper (with the tart on it) onto your baking sheet. Brush the folded edges with the beaten egg.

- Bake for 40–45 minutes, or until the crust is deeply golden brown.
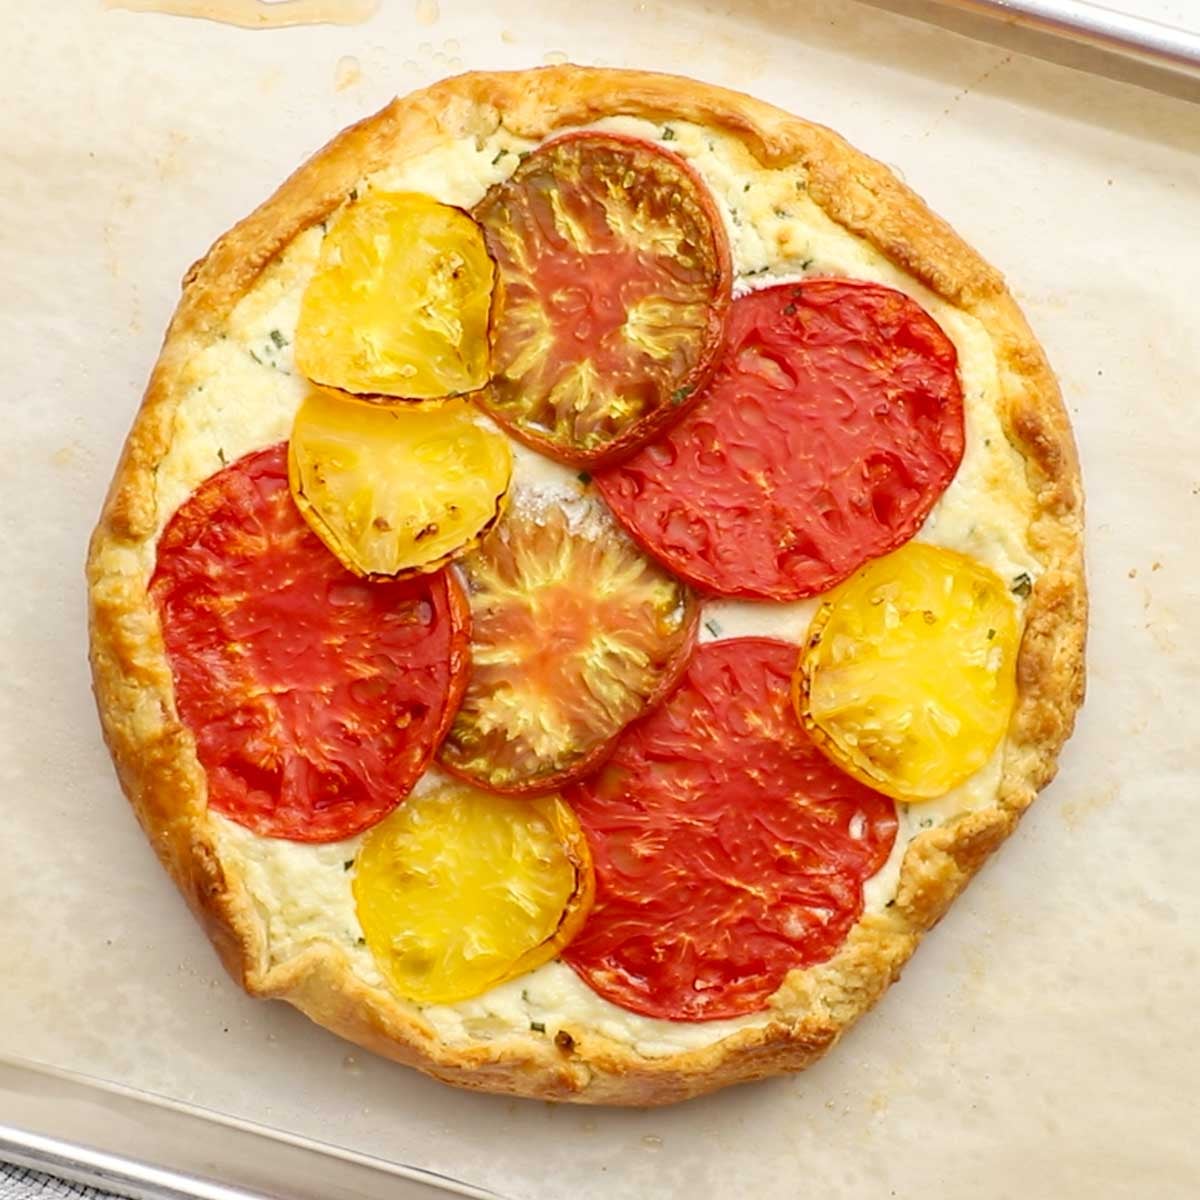
- Finish with a sprinkle of the remaining salt, freshly cracked black pepper, and the sliced fresh basil leaves. Let the tart cool for 10–15 minutes before slicing and serving.

Recipe Tips
Chill the dough after rolling, too. If your kitchen is warm, pop the assembled tart (on the baking sheet) into the fridge for 10–15 minutes before baking. This helps the crust hold its shape better in the oven.

Rotate the tart pan halfway through baking. This helps the crust brown more evenly, especially if your oven has hot spots.
Let the tart rest before slicing. Those tomatoes will release a bit of juice as they bake, and a short cooling time helps the filling set and the flavors settle.
Serving Suggestions
Pair with a simple salad: A crisp green salad with a lemony vinaigrette or this summer peach salad would balance the richness of the heirloom tomato tart perfectly.
Make it brunch-worthy. Add a fried or poached egg on top of each slice and serve with country potatoes or a fruit salad on the side.

Make smaller tartlets for a summer appetizer. Make four or more smaller tartlets by dividing the dough and following the same procedure.
Add a drizzle just before serving. A little bit of good olive oil or balsamic glaze over the top can elevate the flavor and add a nice sheen for presentation.
Serve with sparkling wine or rosé. The tartness of tomatoes and richness of ricotta go really well with something light and bubbly – perfect for an al fresco dinner.
Storage Instructions
Let the tart cool completely, then transfer any leftovers to an airtight container or wrap slices tightly in foil or beeswax wrap. You can store this heirloom tomato tart in the fridge for up to 3 days.
Warm the slices in a 350°F oven for about 10–15 minutes, or until heated through. This helps the crust stay crisp. The microwave works in a pinch, but the crust will soften (I still do it all the time!).
I don’t recommend freezing this tart—the tomatoes can get watery and the crust tends to lose its flakiness once thawed.
Tell me what you think!
If you try this recipe, l’d be so grateful if you’d leave a comment and a rating in the recipe card. I love to hear your feedback, and your tips can help other readers too!

Heirloom Tomato Tart
Ingredients
For the dough
- 1 1/4 cups all-purpose flour
- 1/2 teaspoon kosher salt
- 1/2 cup unsalted butter very cold, cubed
- 1/4 cup ice water
For the filling
- 1 cup whole milk ricotta cheese
- 1 clove garlic grated or minced
- 1 tablespoon fresh basil 1 teaspoon chopped, 2 teaspoons sliced for garnish
- 1 1/2 teaspoons chopped chives
- 1/2 teaspoon chopped fresh thyme
- 1/4 teaspoon lemon zest
- 1 teaspoon kosher salt divided
- 1 pound heirloom tomatoes 1/4 inch slices
- 1 egg whisked
- Cracked black pepper to taste
Instructions
Prepare the crust
- In a large bowl, whisk together the flour and salt.
- Using a pastry blender, two butter knives, or your fingers, cut the cold butter into the flour mixture until crumbly, with pea size pieces.
- Gradually add the water a couple of tablespoons at a time, mixing with a wooden spoon after each addition, until the dough just starts to come together and can be formed into a ball. Do not add too much water.
- Wrap the dough in plastic wrap, forming into a smooth disk. Smooth the sides to avoid cracking while rolling.
- Chill the dough at least one hour.
Prepare the filling
- Preheat the oven to 400 degrees F, placing an oven wrack on the center shelf.
- In a medium-sized bowl, combine the ricotta, garlic, chopped basil, chives, thyme, lemon zest, and 1/2 teaspoon of salt.
- Place the dough on a sheet of parchment parchment paper cut to fit a baking pan. Lightly flour the top of the dough, then roll into a 12-inch round.
- Spread the ricotta filling on top, leaving an inch around the edge of the dough. Top with the tomatoes, then fold the excess dough over the ricotta.
- Carefully transfer the parchment paper onto the baking sheet. Brush the egg on top of the exposed dough, then bake for 40-45 minutes, until the edges are golden brown.
- Top with the remaining salt, cracked black pepper to taste, and the sliced basil. Let cool for at least 10-15 minutes before serving.