Dark Chocolate Truffles with Caramel
This post contains links to affiliate websites, such as Amazon, and we receive an affiliate commission for any purchases made by you using these links. We appreciate your support!
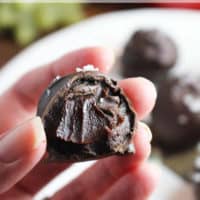
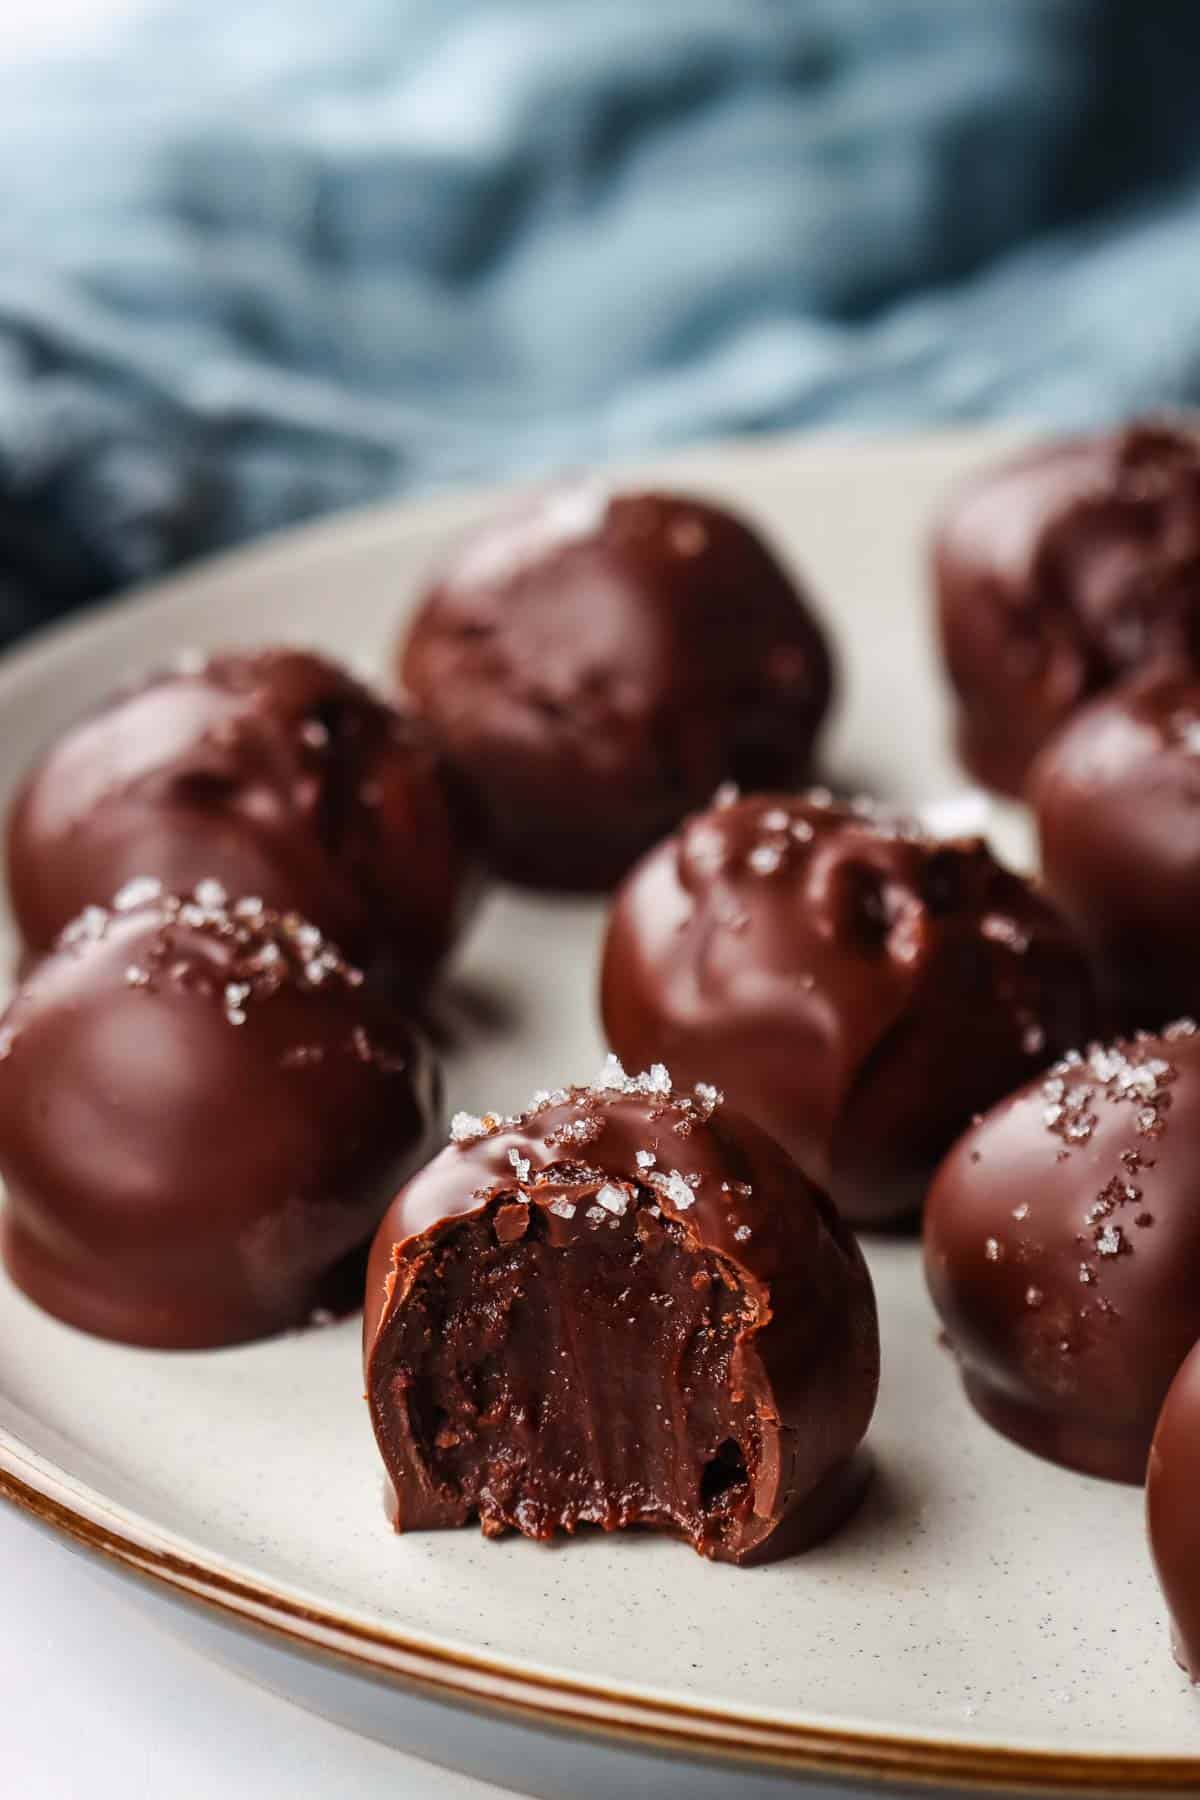
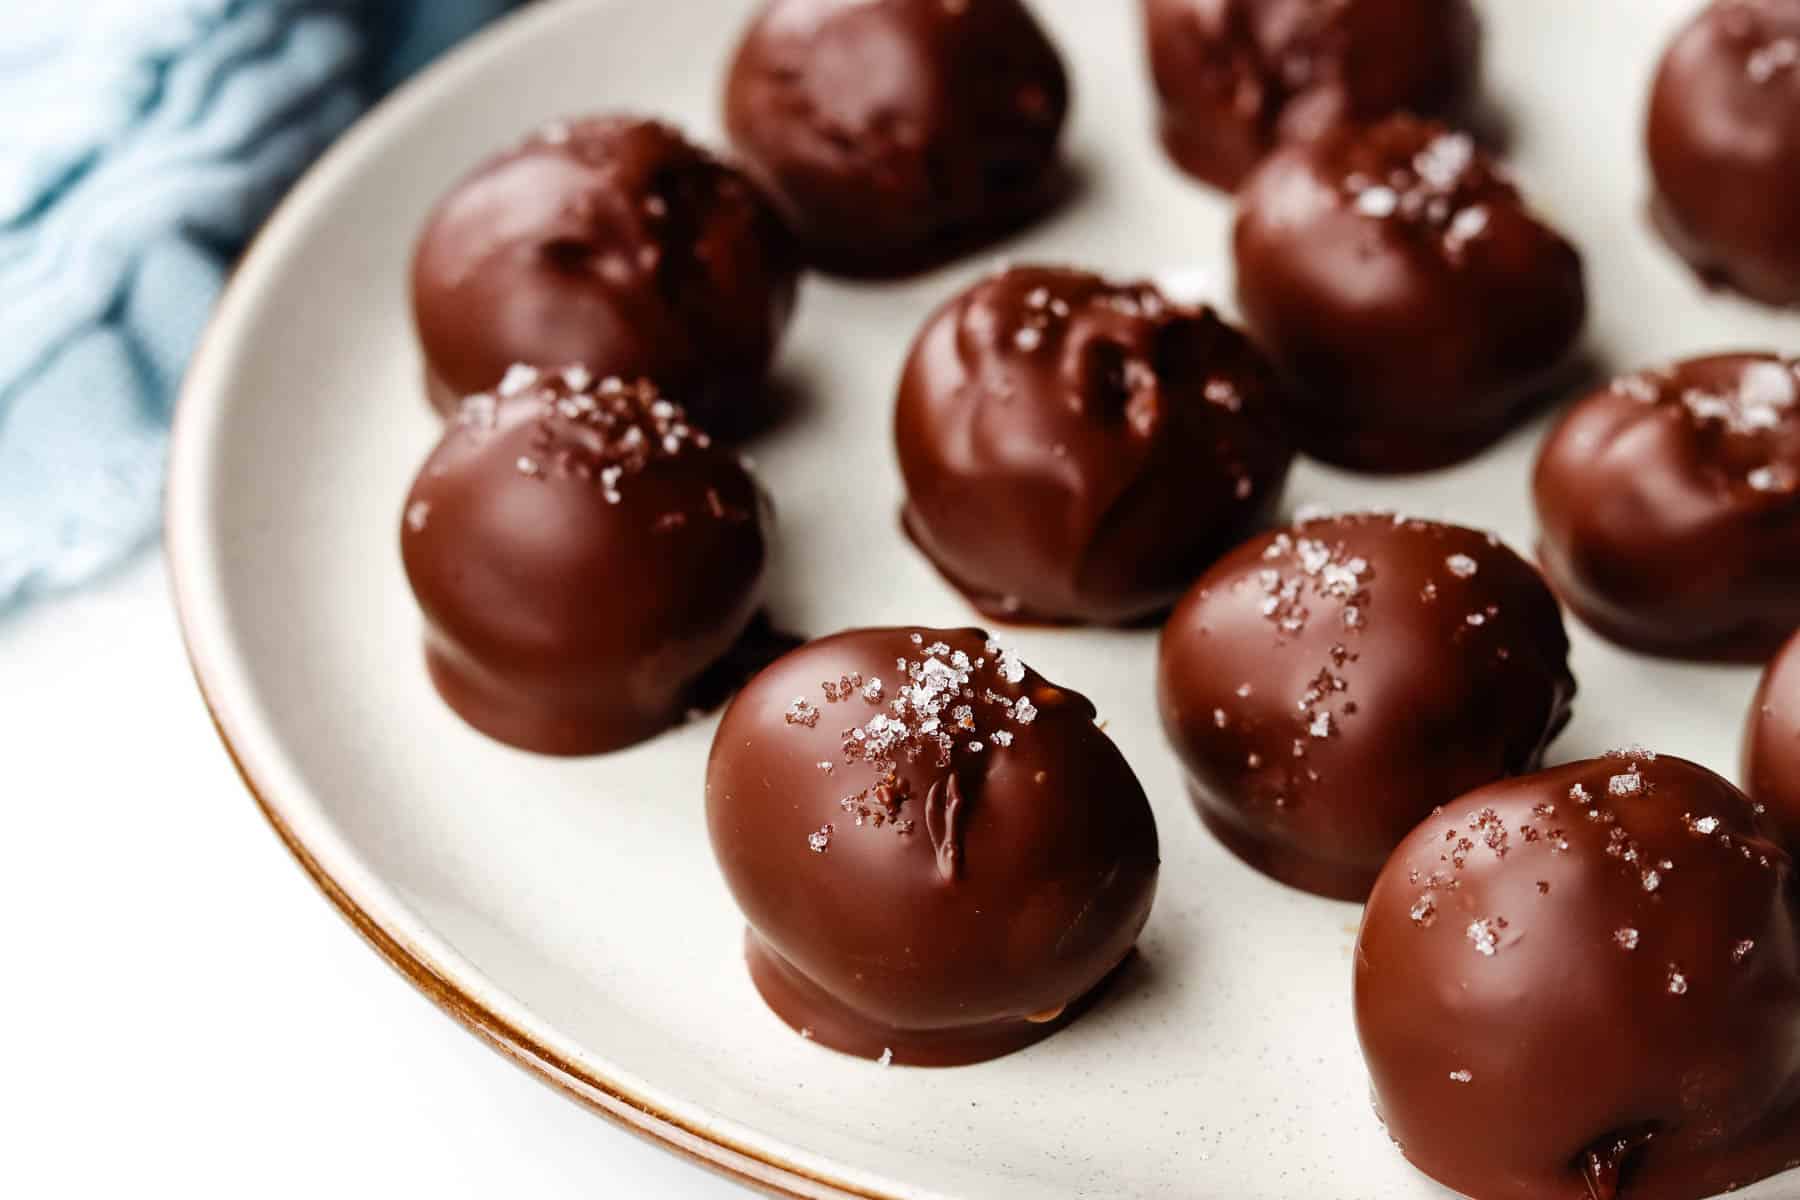
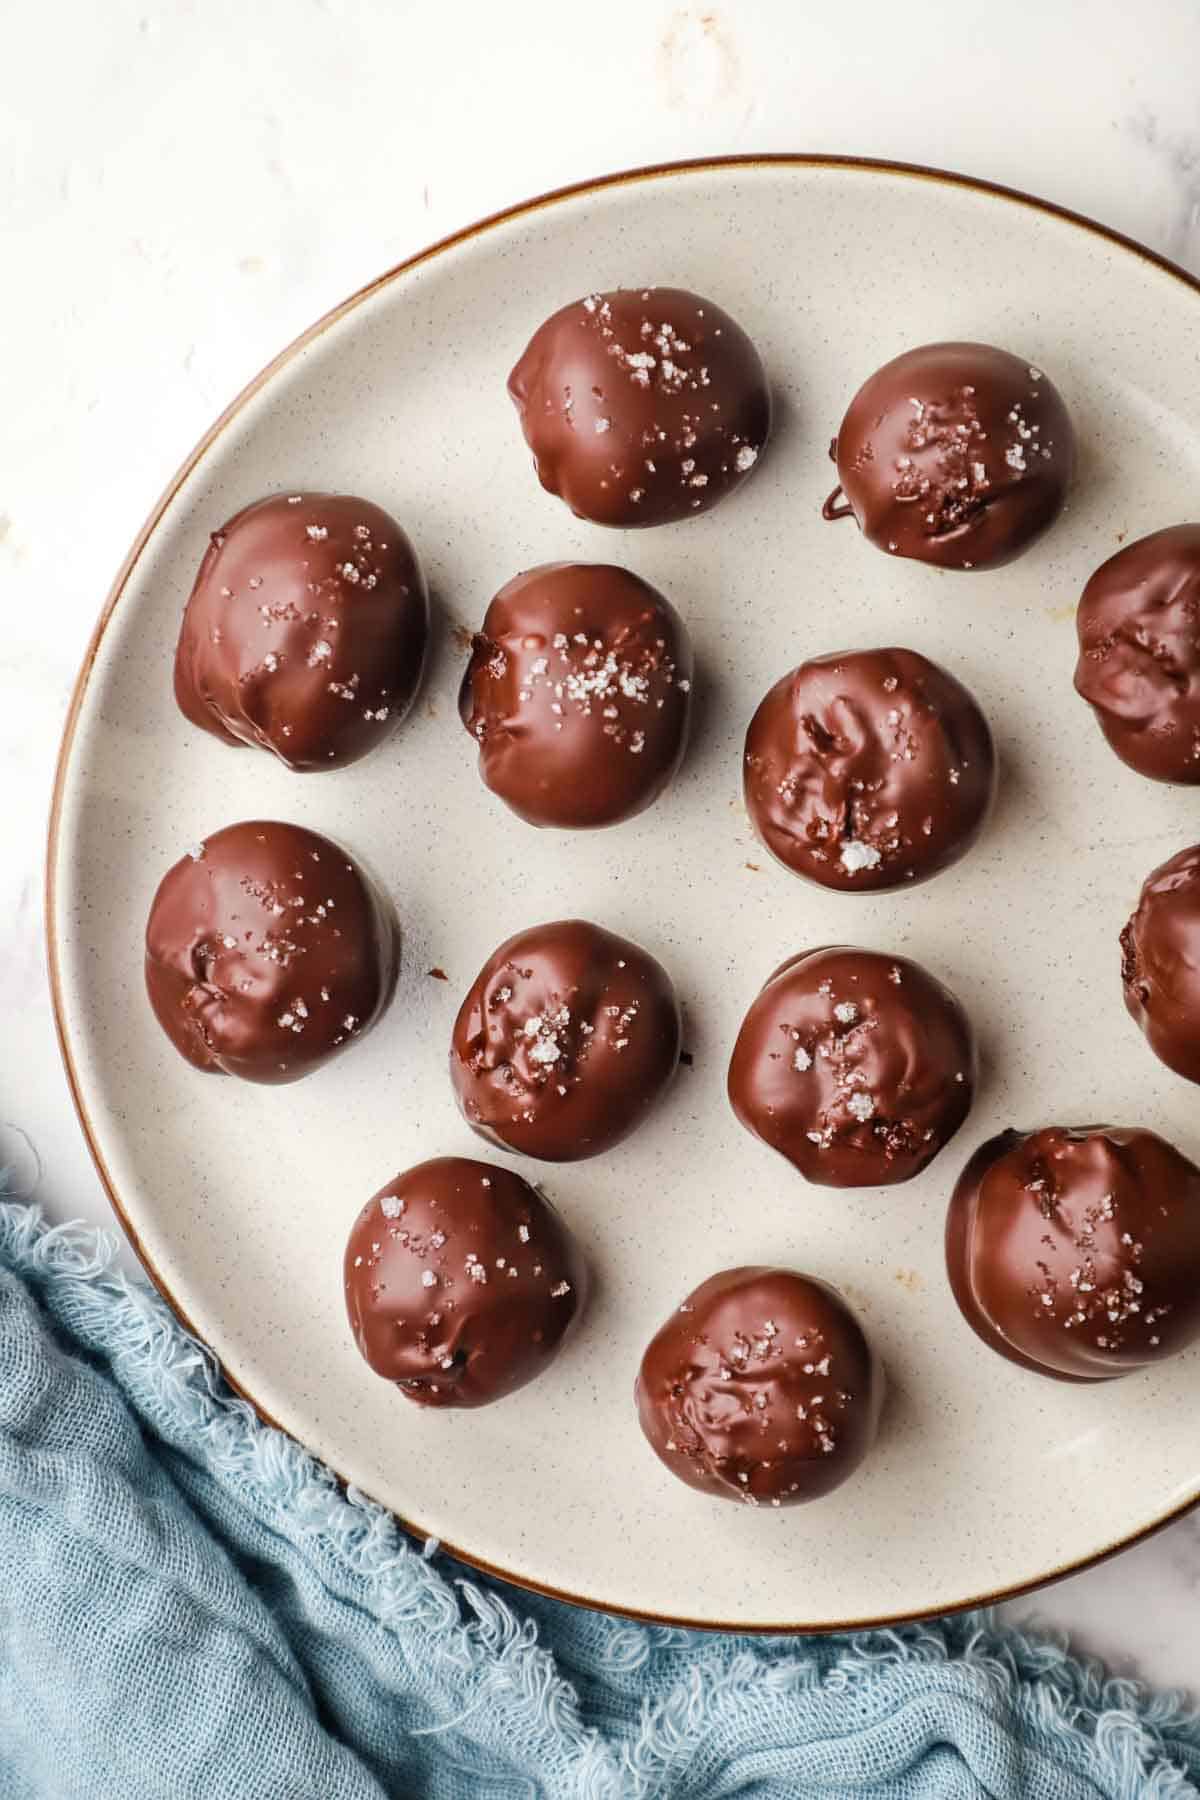
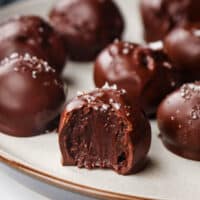
A silky dark chocolate filling with toasty caramel notes makes these dark chocolate truffles with caramel an elegant, impressive, and decadent treat!
Are are you looking to add a touch of elegance to your holiday party with a make-ahead treat that will really impress?
Or are you tired of making the same shortbread year after year, and looking for new ideas for your holiday food gifts ? Something with a real “wow” factor?
These dark chocolate truffles with caramel are beautiful, decadent, as well as fun and easy to make with my detailed step-by-step instructions!
Why you should make these chocolate truffles with caramel
- They make a great edible gift. I first made these chocolate caramel truffles years ago as bridal shower favors for a friend and they were a big hit. They have since been in regular demand from family and friends who still remember them even years later!
Most recently I made them as part of my Thanksgiving dessert spread, and was able to send guests home with a few extras, which was a perfect parting gift. Homemade truffles are really the best food gift! - They’re a great make-ahead dessert. Properly stored, these truffles will last for weeks, so you can prepare them well ahead of any event and they’ll be as amazing as the day you made them!
- They’re a perfect small indulgence. I always have a few people at my gatherings that are not into overly decadent desserts and prefer to just nibble on something small. I love to have something featuring dark chocolate, like these truffles or this chocolate-dipped fruit on hand for those guests.
- They require only 3 ingredients plus salt. All you need is some high quality chocolate and a little sugar and cream to make these happen.
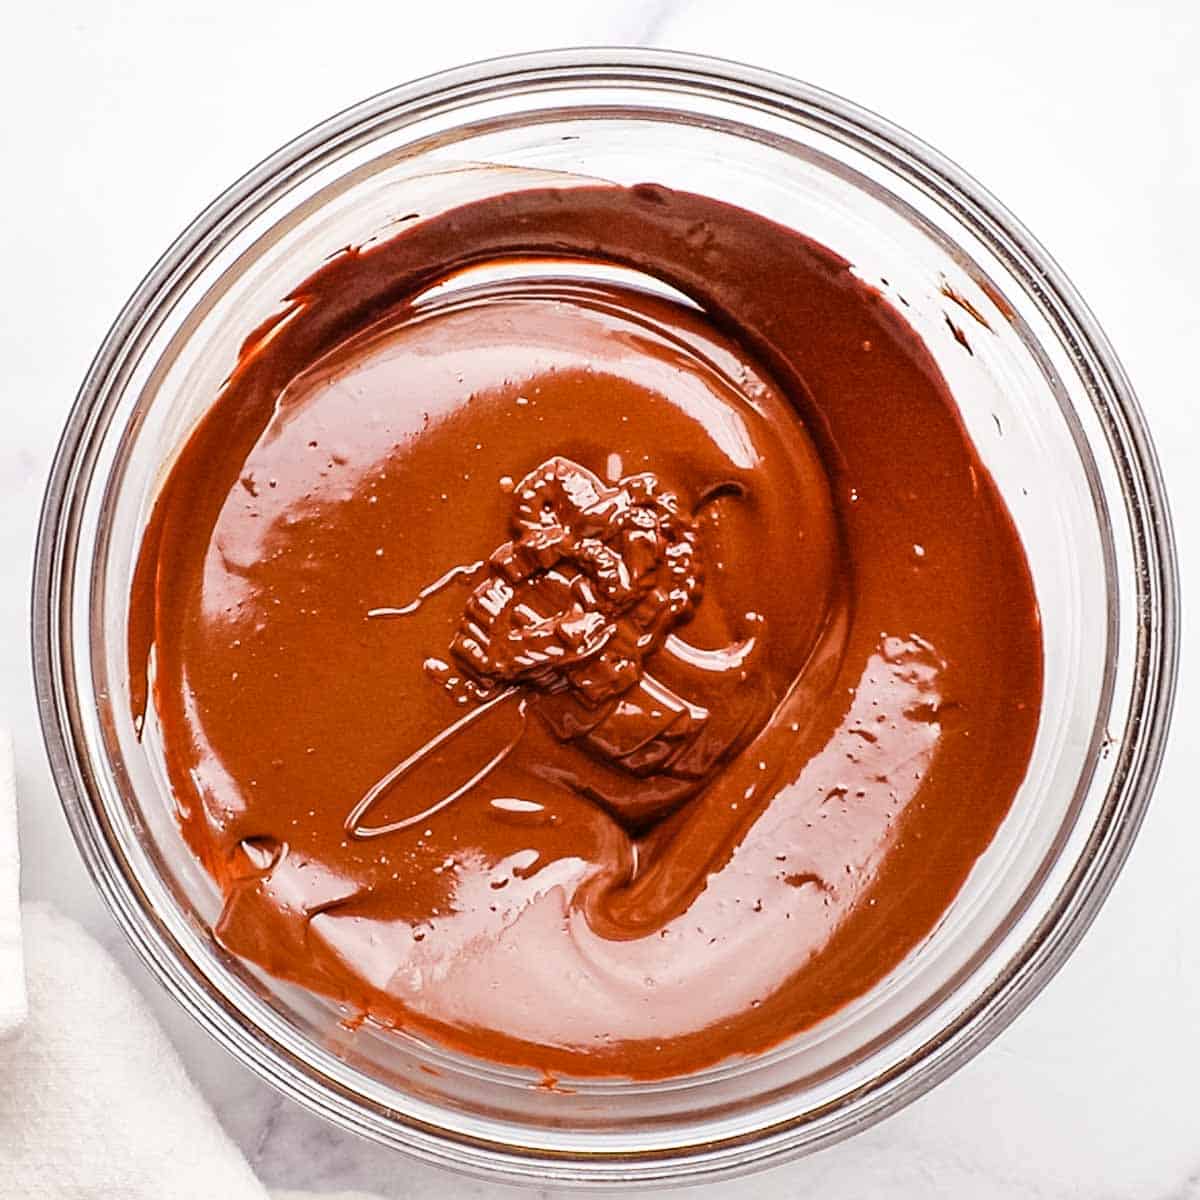
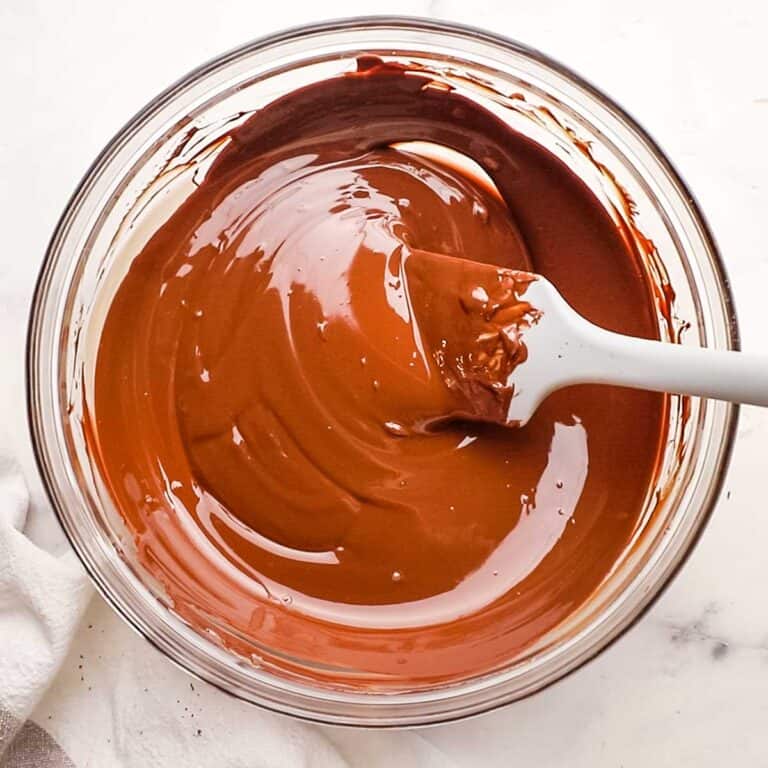
The ganache center for these dark chocolate truffles is super easy to make. Just melt some chocolate, make a quick caramel and combine the two. The result is a rich, silky-smooth dark chocolate center, with a hint of toasty caramel flavor.
Why Temper Chocolate?
The point of tempering the chocolate is so that it will stay hard, beautiful and shiny at room temperature.
I consider tempering the chocolate coating for these truffles to be essential for the best look and texture. If tempering makes you nervous, don’t worry, I’ve developed a pretty fool-proof method for tempering chocolate over the years, which is detailed below. You don’t even need a thermometer!
The process is simple: slowly melt some chocolate, and slowly mix in more chocolate. Stir a lot. For even more tips for chocolate tempering see my ultimate guide on how to temper chocolate in the microwave.
Untempered (or improperly tempered) chocolate left at room temperature tends to “bloom”, which means that it develops grayish streaks, and a crumbly texture. It is totally safe to eat, and tastes fine though, so if this happens don’t toss them!
Ingredient notes
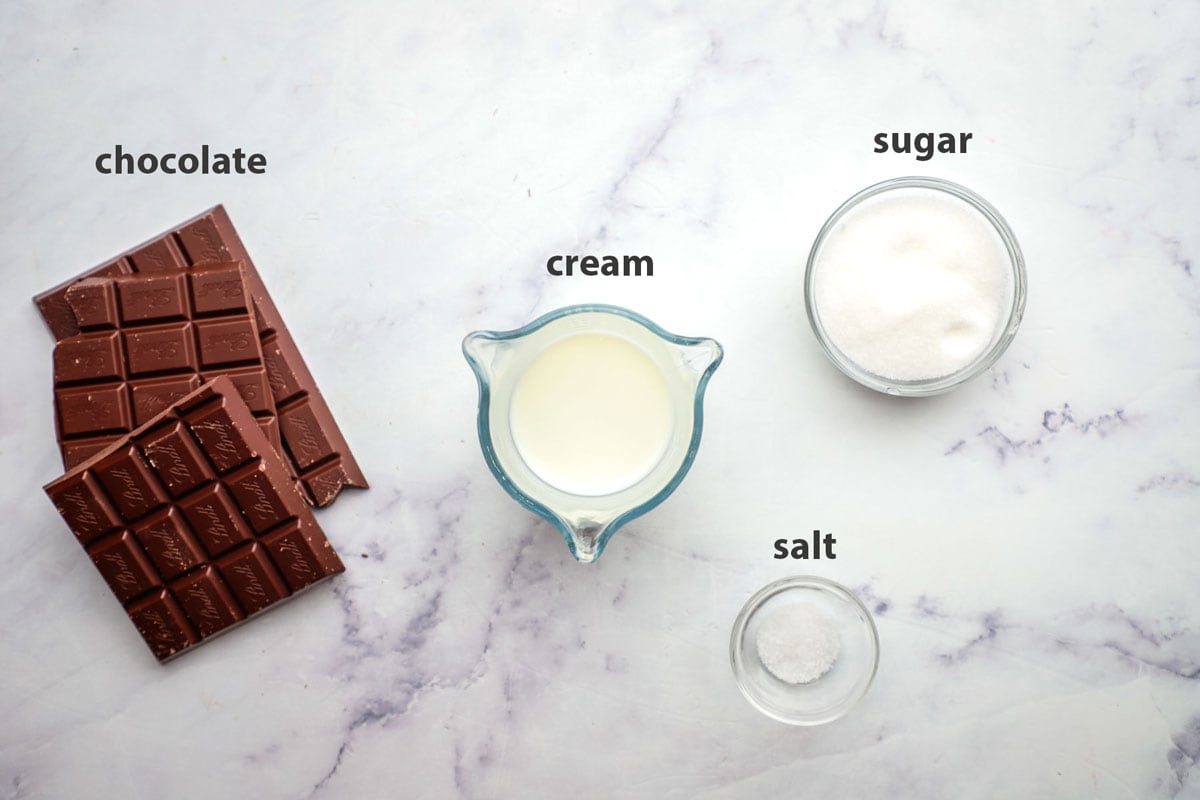
Chocolate
Use a pure dark chocolate for these truffles, as you will need it for both the filling and the chocolate coating. Chocolate chips are generally not great for tempering, so a bar chocolate is your best bet. Ghirardelli, Bakers, Dove, or any other brand you enjoy will work.
Cream
The cream will be used to make the caramel that will be combined with chocolate to make a caramel ganache filling. I like to use heavy cream, but you could use half and half instead if you prefer.
Sugar
The sugar will be melted to make the caramel in the filling. Regular granulated sugar works best for this.
Sea salt
I like to use a flaky sea salt like fleur de sel, both for mixing into the filling, and for garnishing the truffles. It adds just the right touch to balance the sweetness of the truffles.
How to make dark chocolate truffles with caramel
TIP: Be sure to watch the video in the recipe card before you begin!
Make the filling
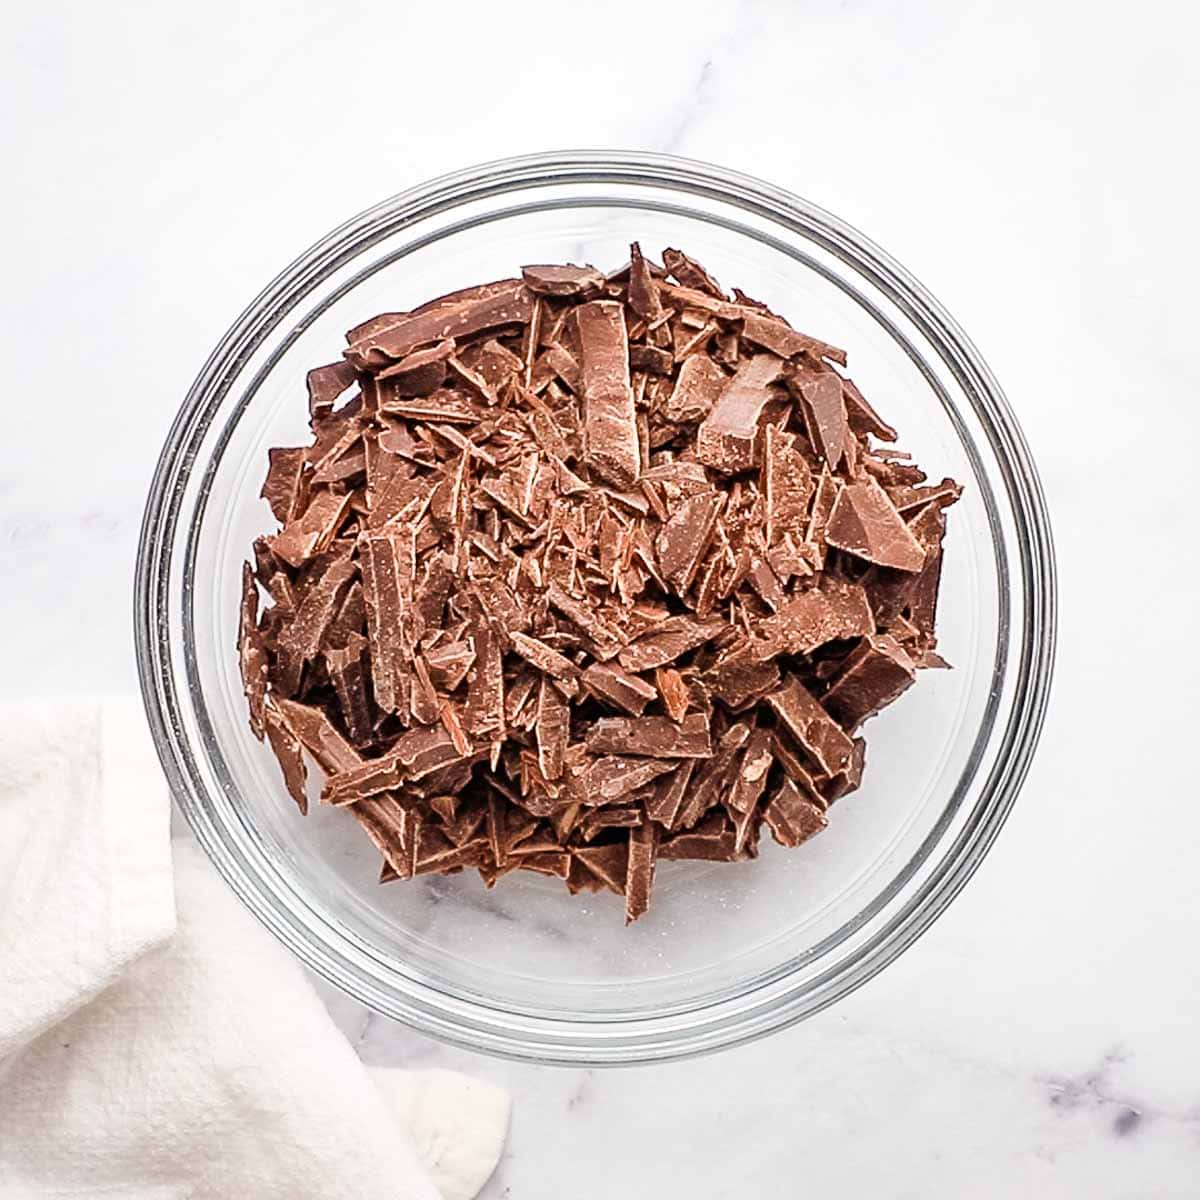
- Chop 8 oz of the chocolate coarsely and melt it in 30 second bursts in the microwave, stirring after each one.
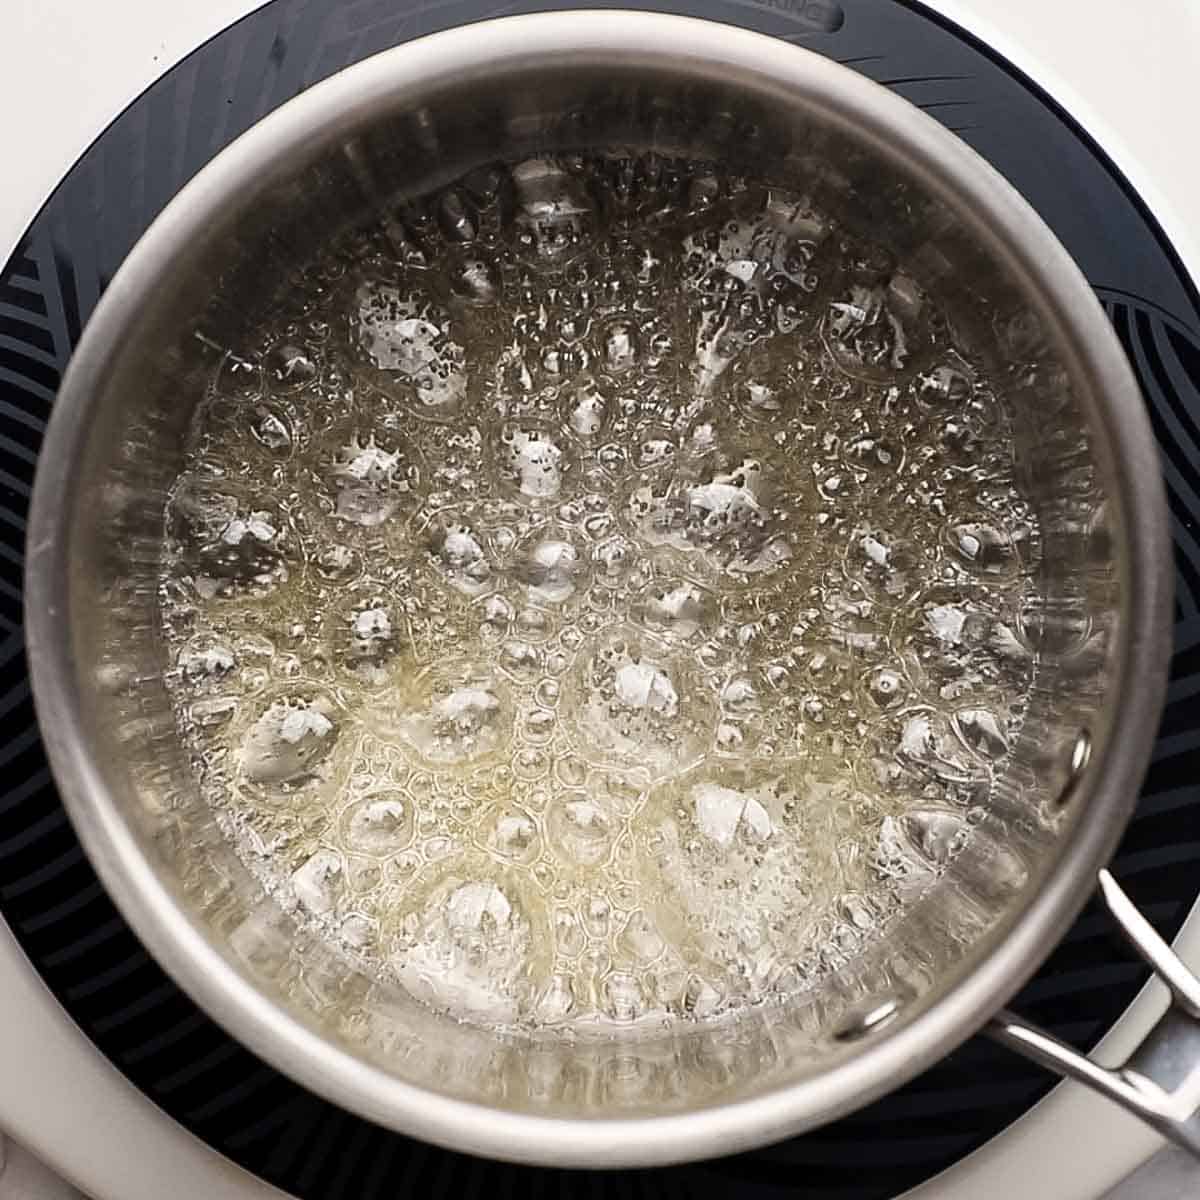
- Bring the cream to a simmer in a small saucepan.

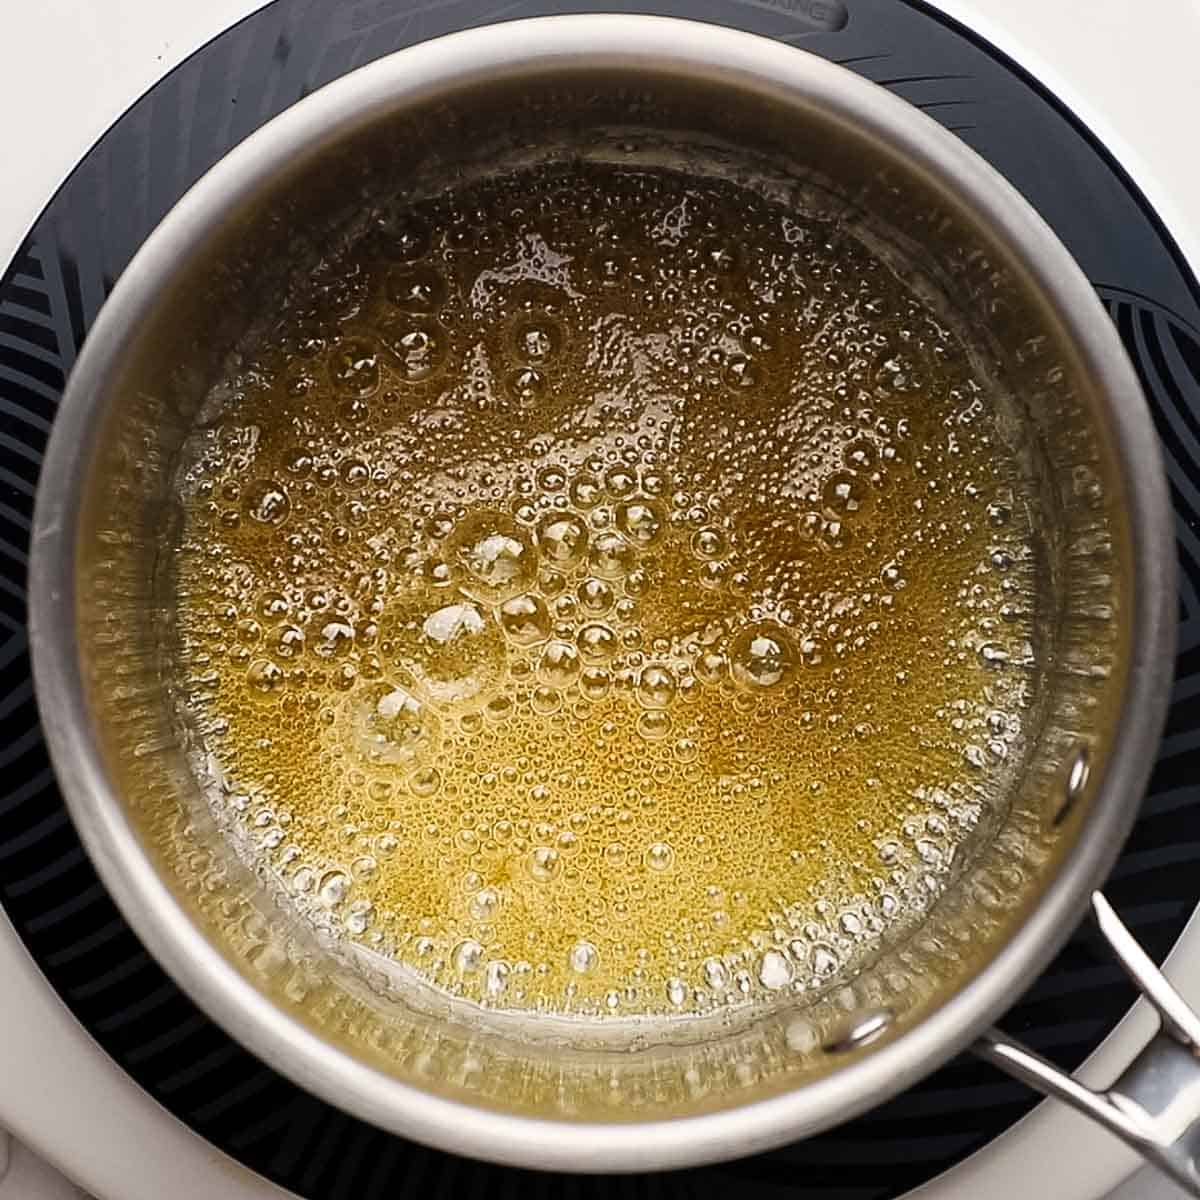
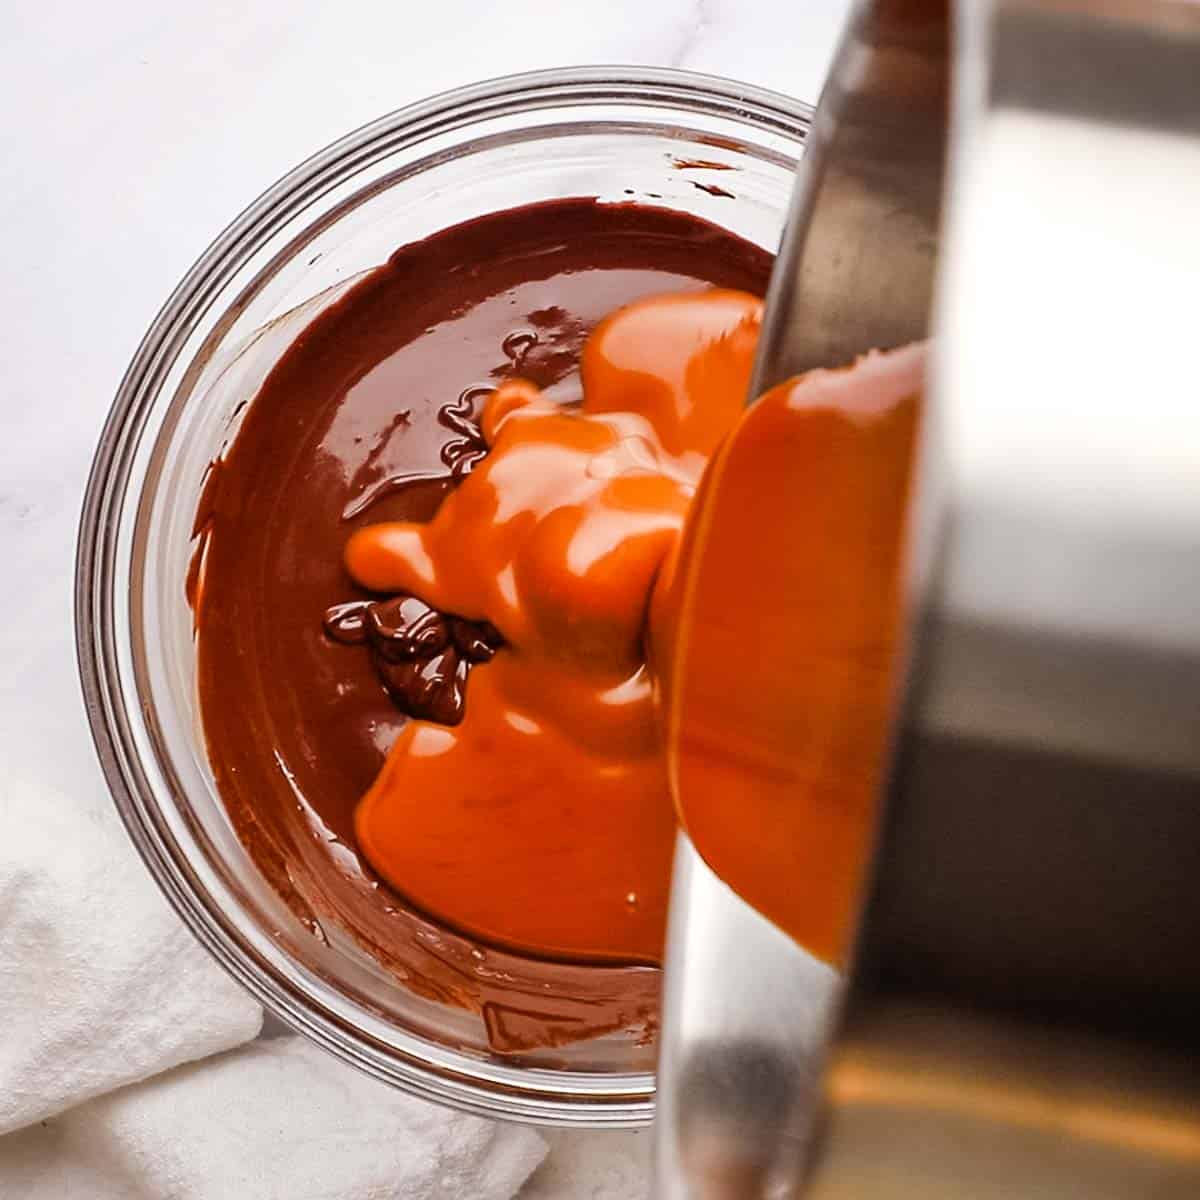
- In the meantime, add the water and sugar to another saucepan, bring to a boil, and cook, swirling the pan occasionally, until the liquid is amber colored.
Want to SAVE this recipe?

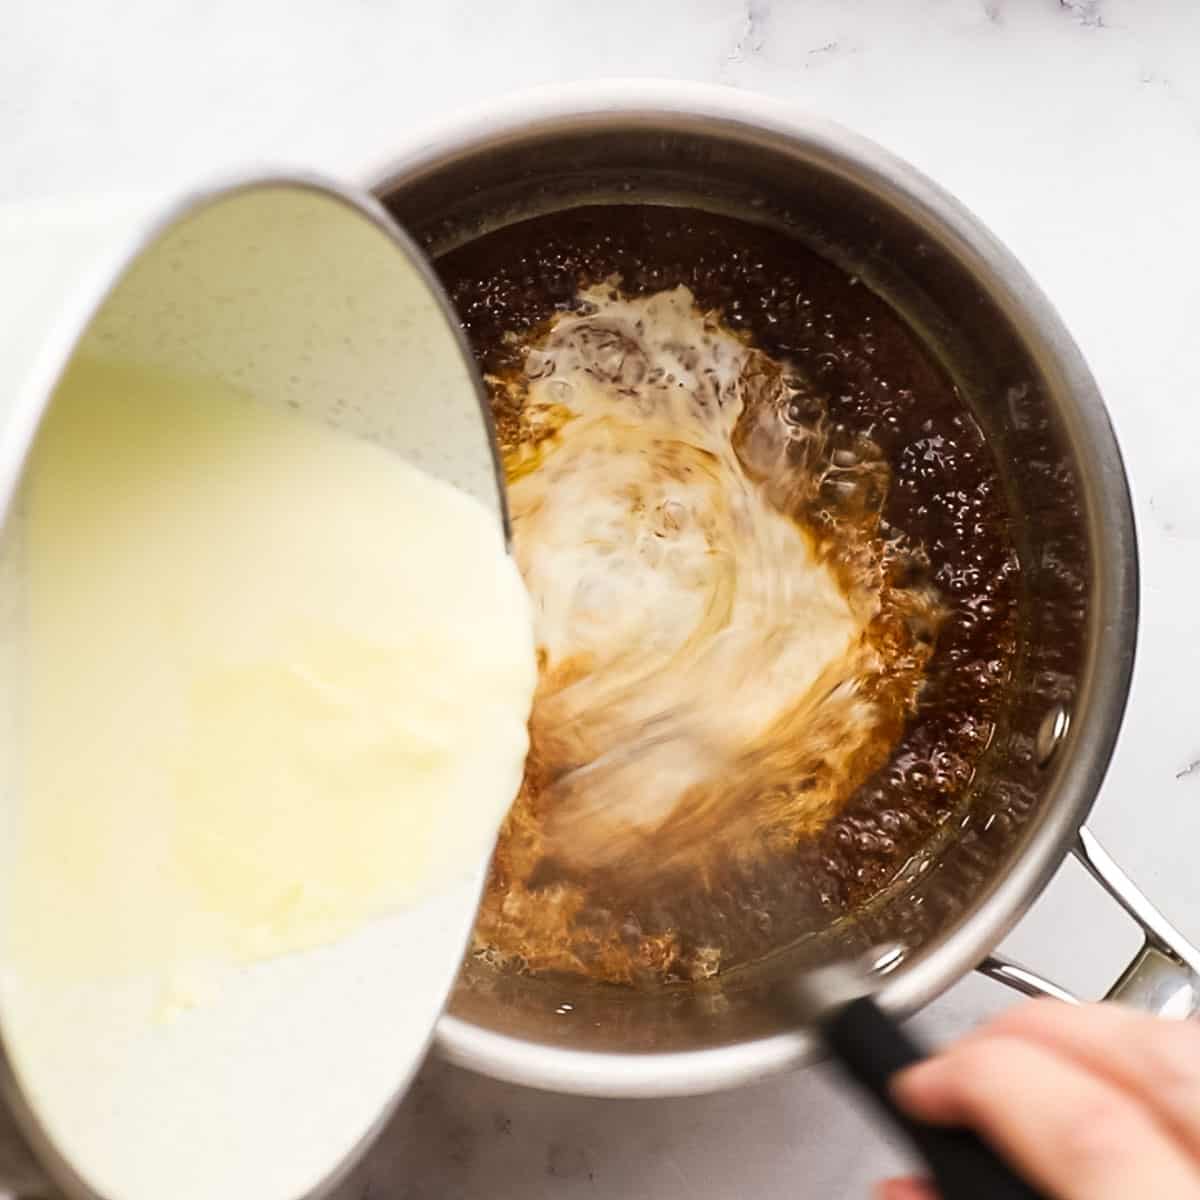
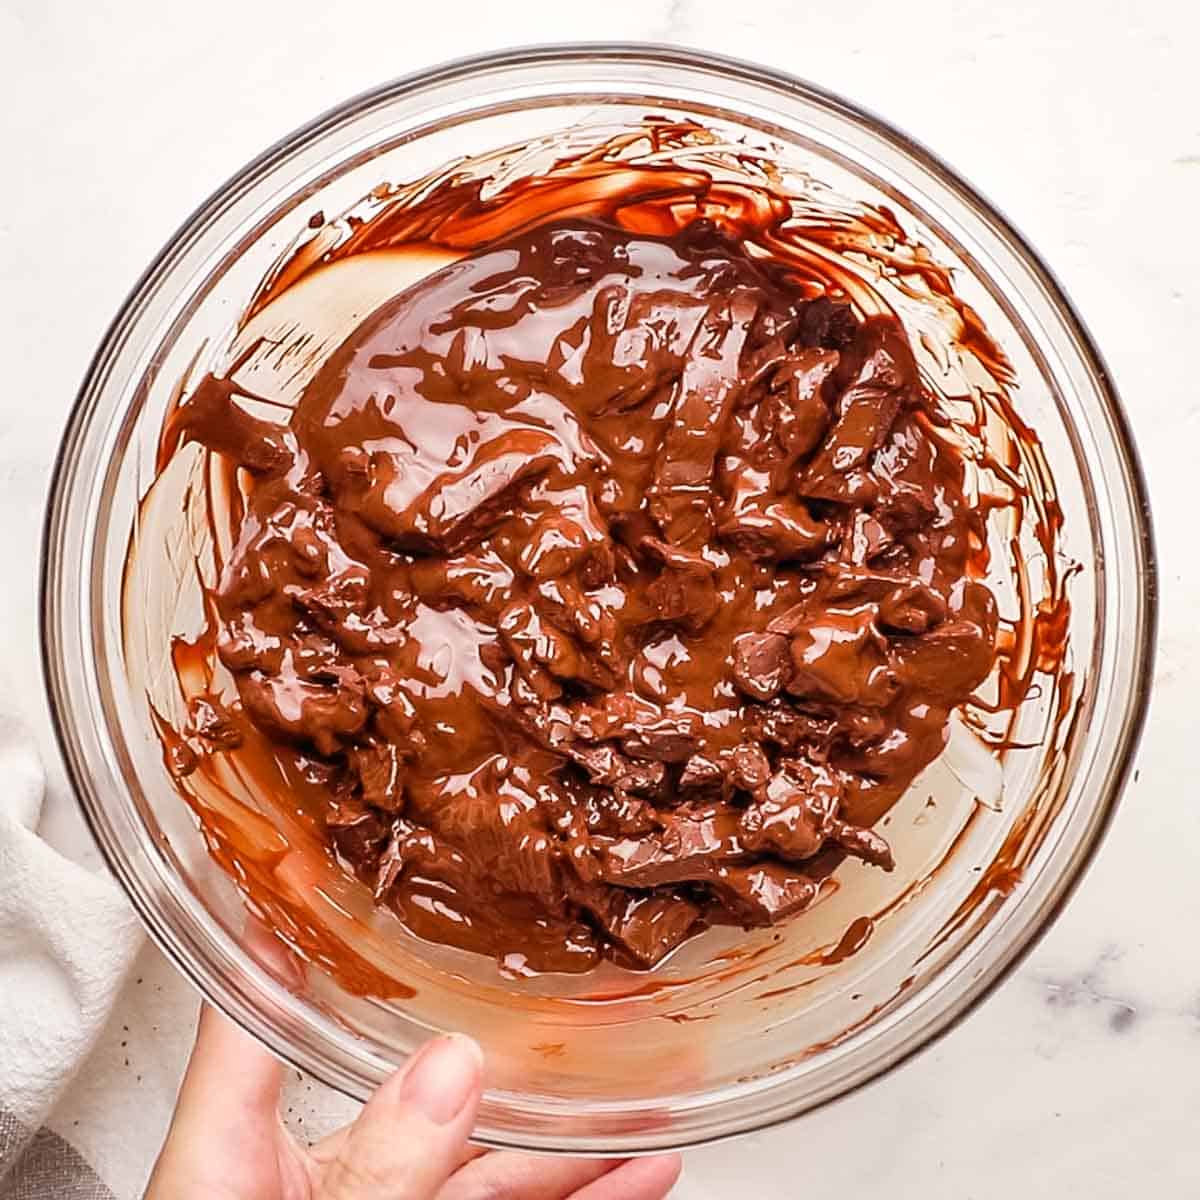
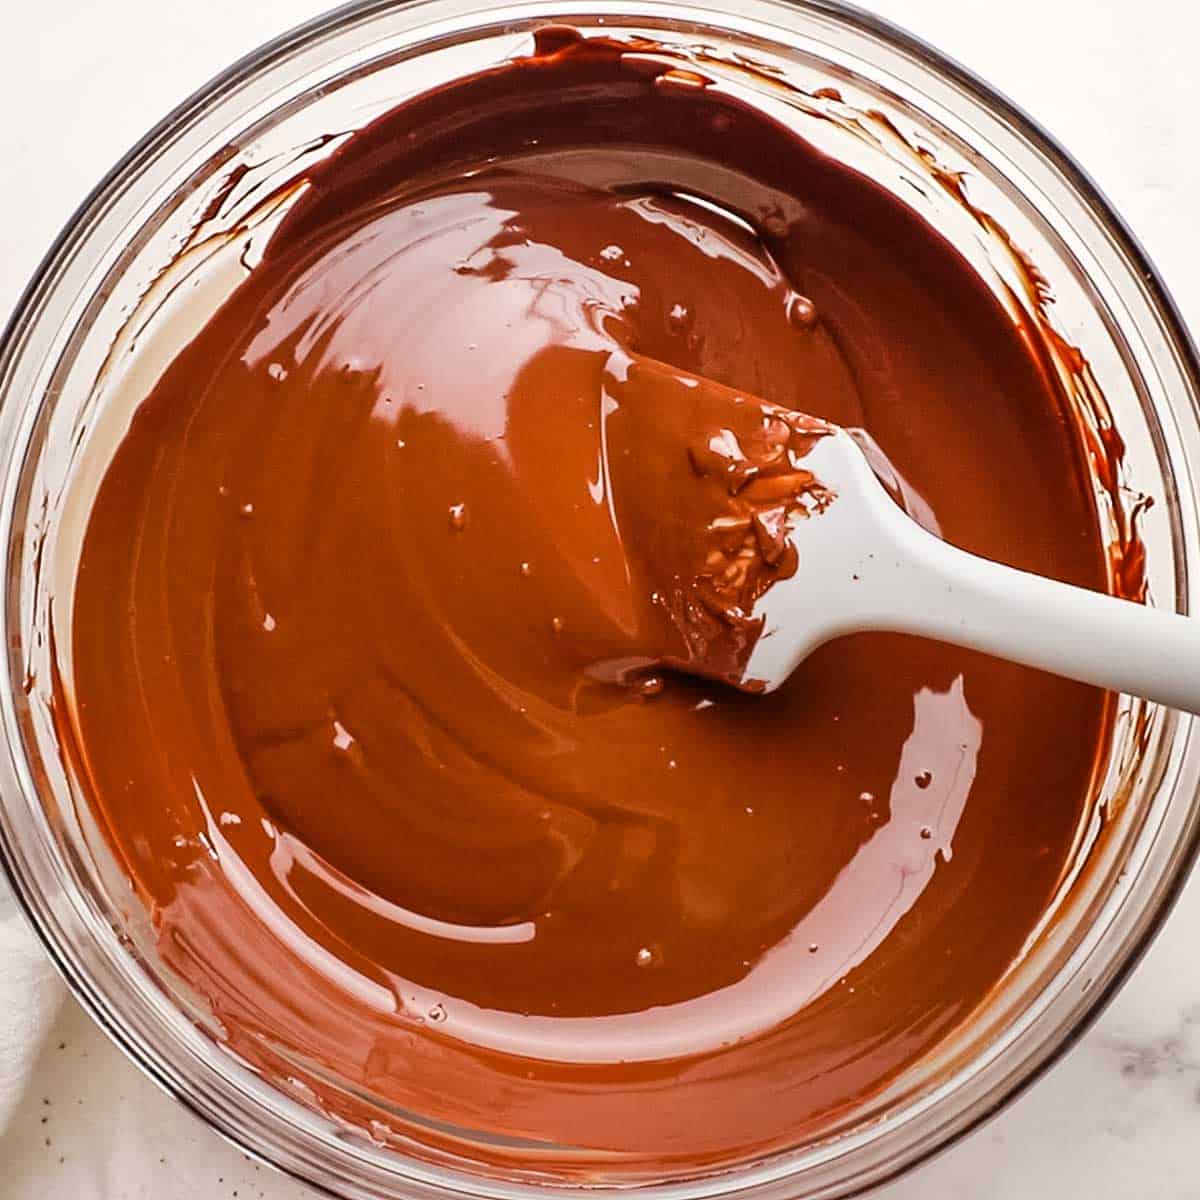
- Remove the pan from the heat and immediately and slowly pour in the cream, while whisking constantly. Whisk until smooth.
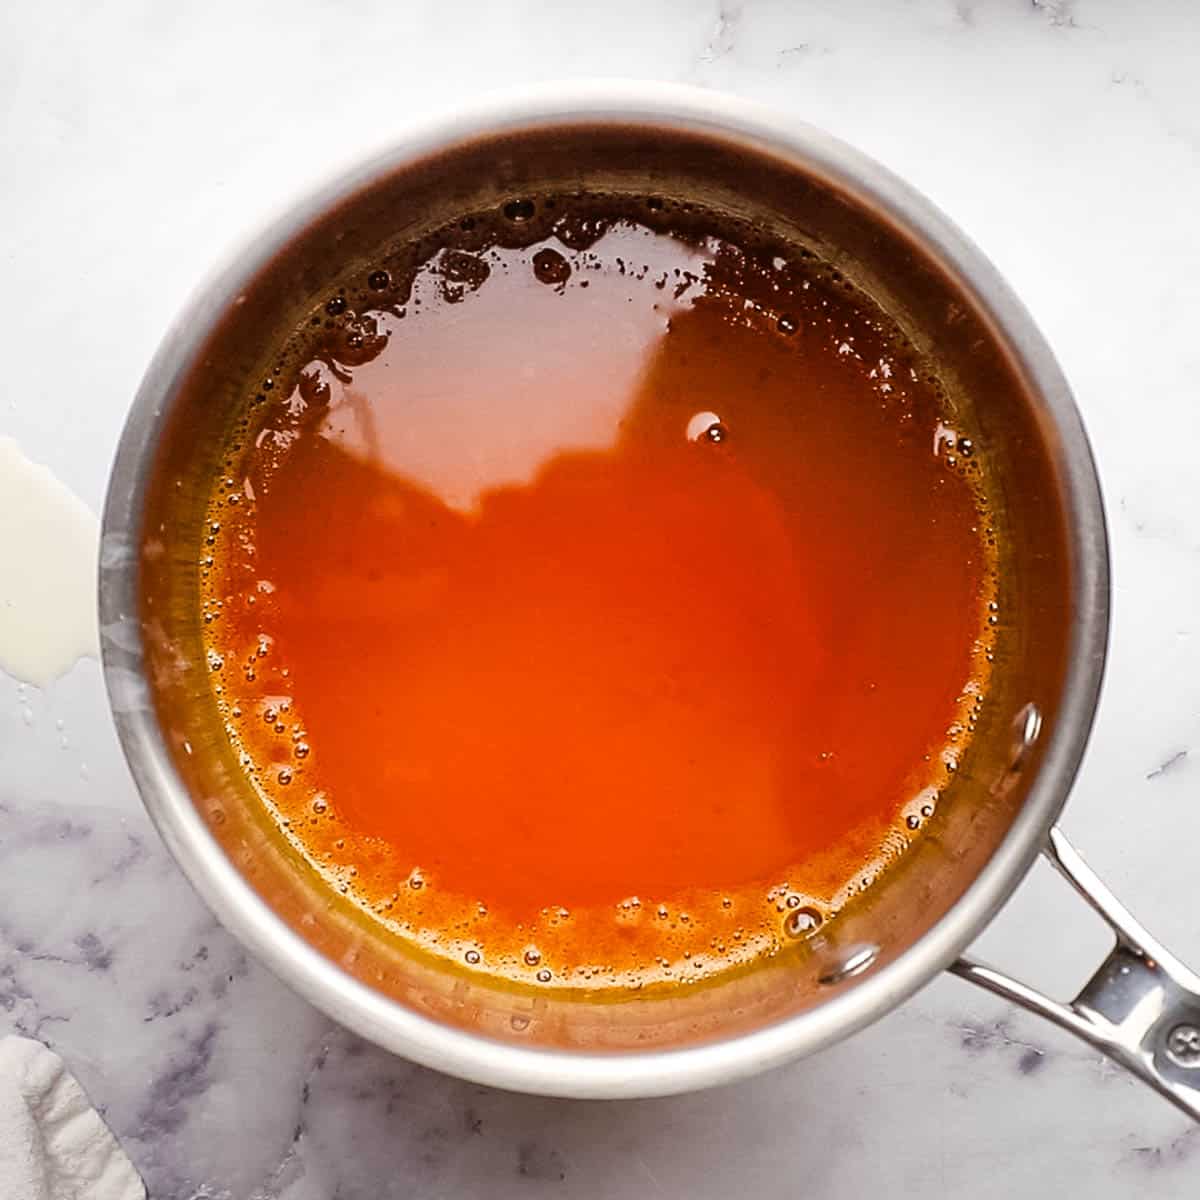
- Pour the caramel into the melted chocolate and whisk to combine. Add salt and whisk to combine.
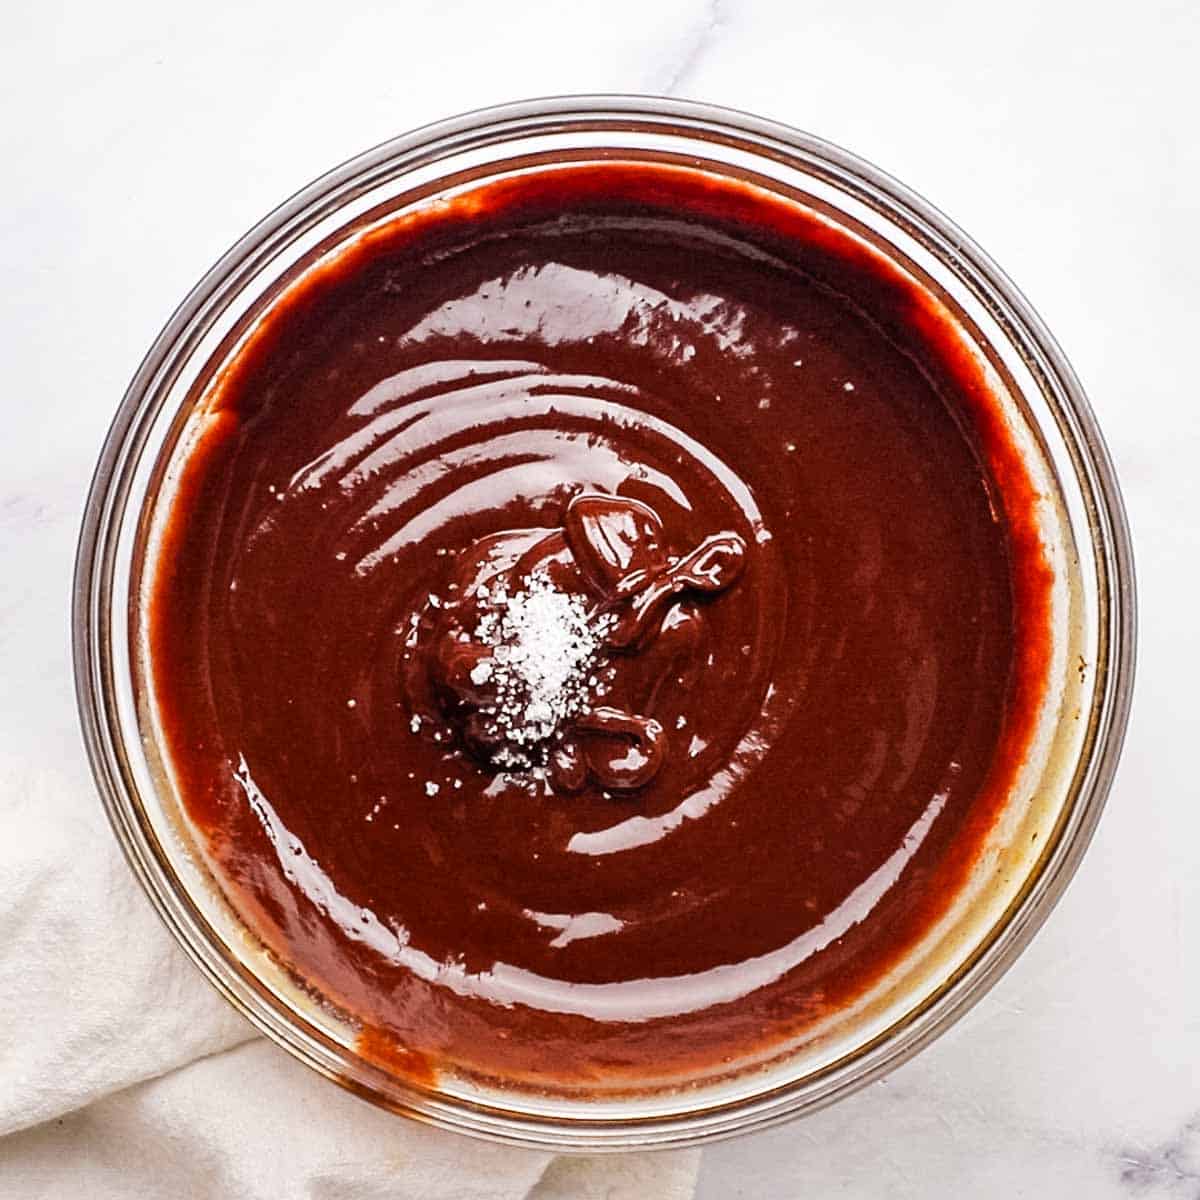
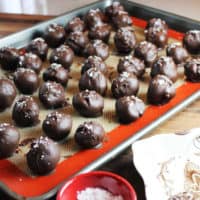
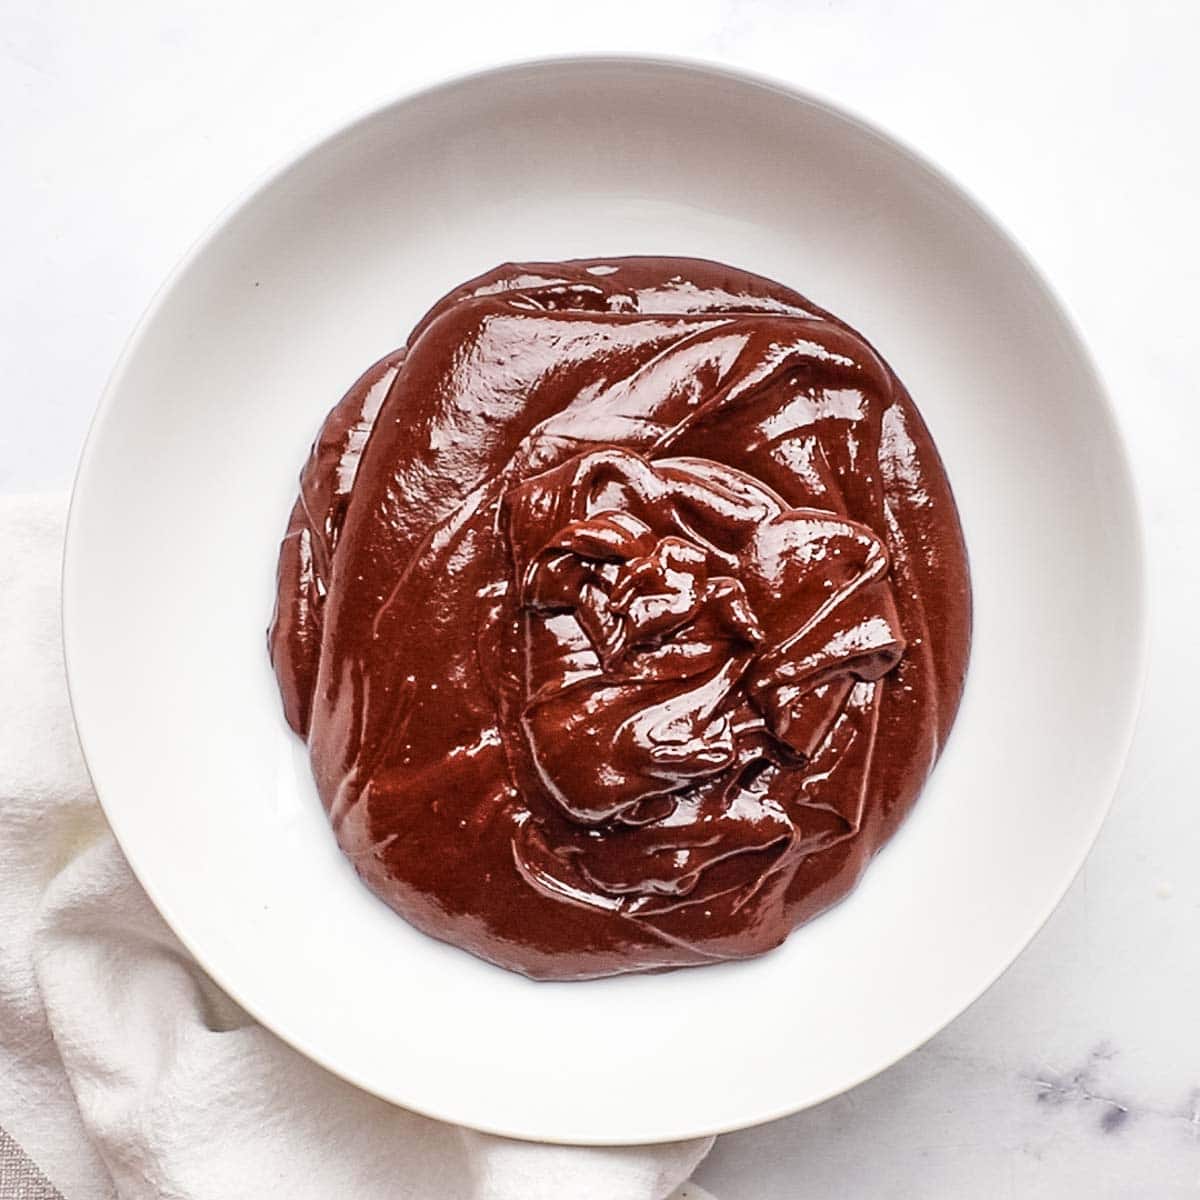
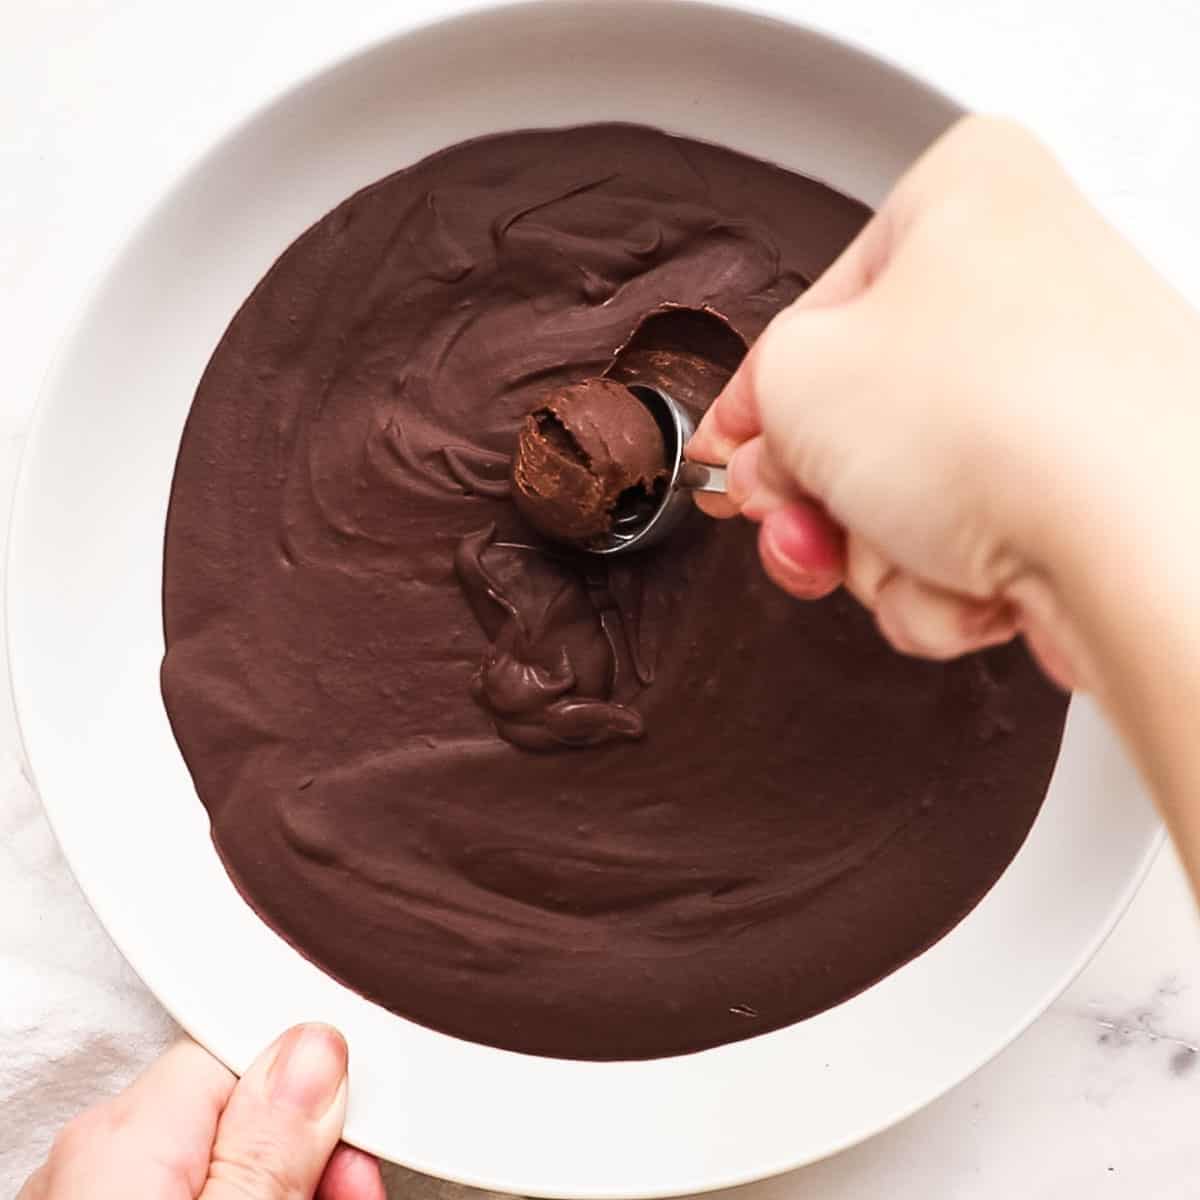
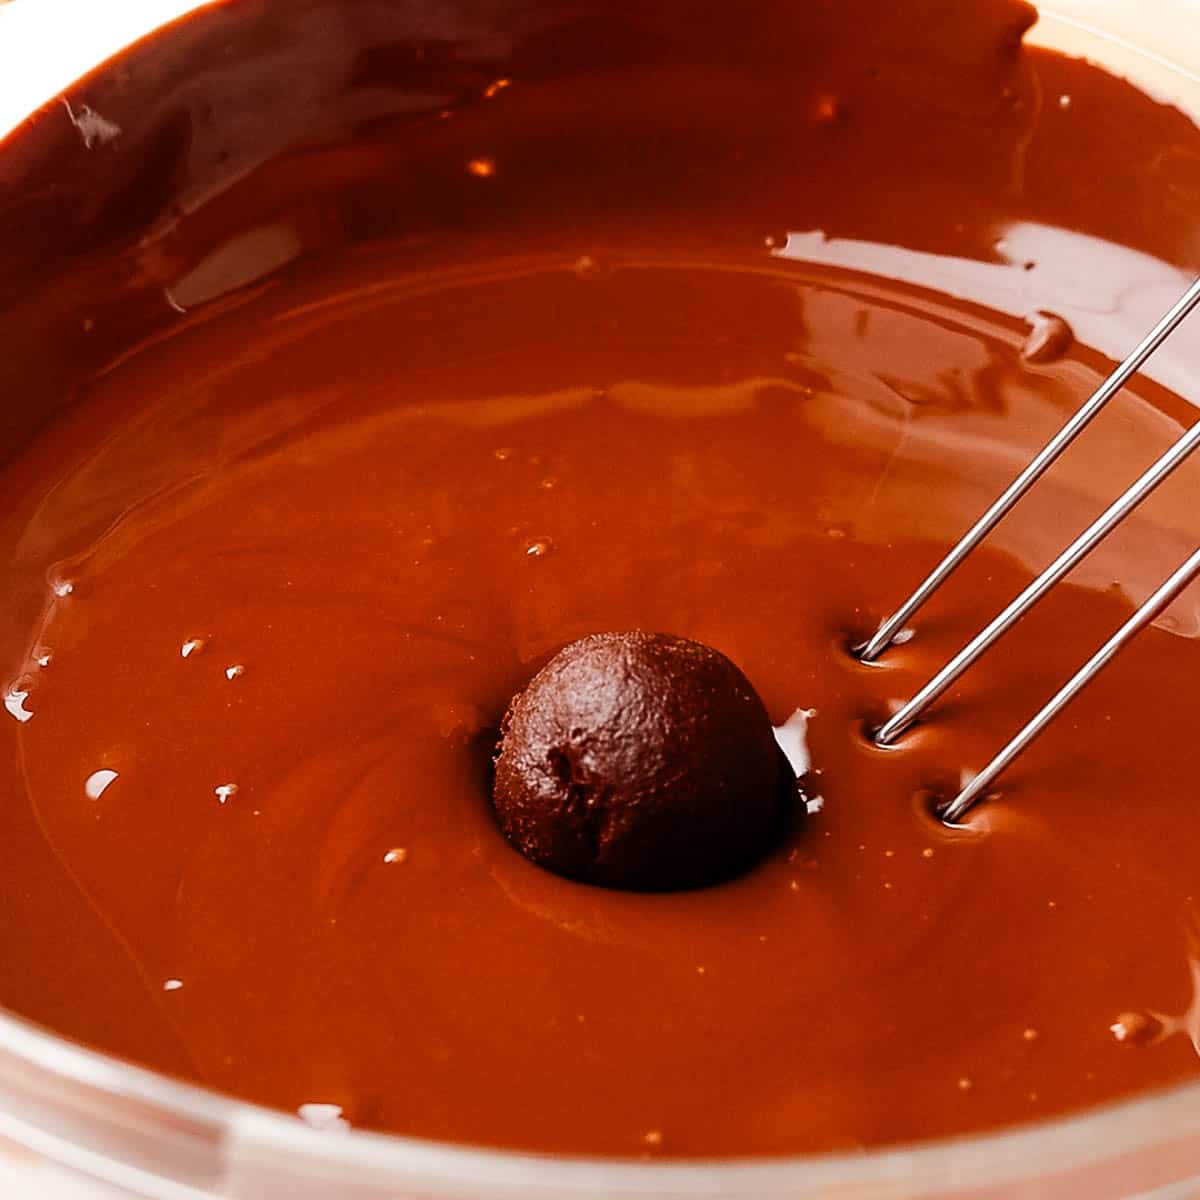
- Pour into a shallow bowl and transfer to the refrigerator until the mixture is firm enough to roll into balls. In the meantime, prepare a baking sheet by lining it with a silicone mat or parchment paper. Using a small spoon, scoop about 1 tablespoon portions of filling and roll into balls.
- Place the balls onto a the prepared baking sheet and transfer the baking sheet to the refrigerator to chill for a bit while you temper the chocolate for dipping.
Temper the chocolate for dipping
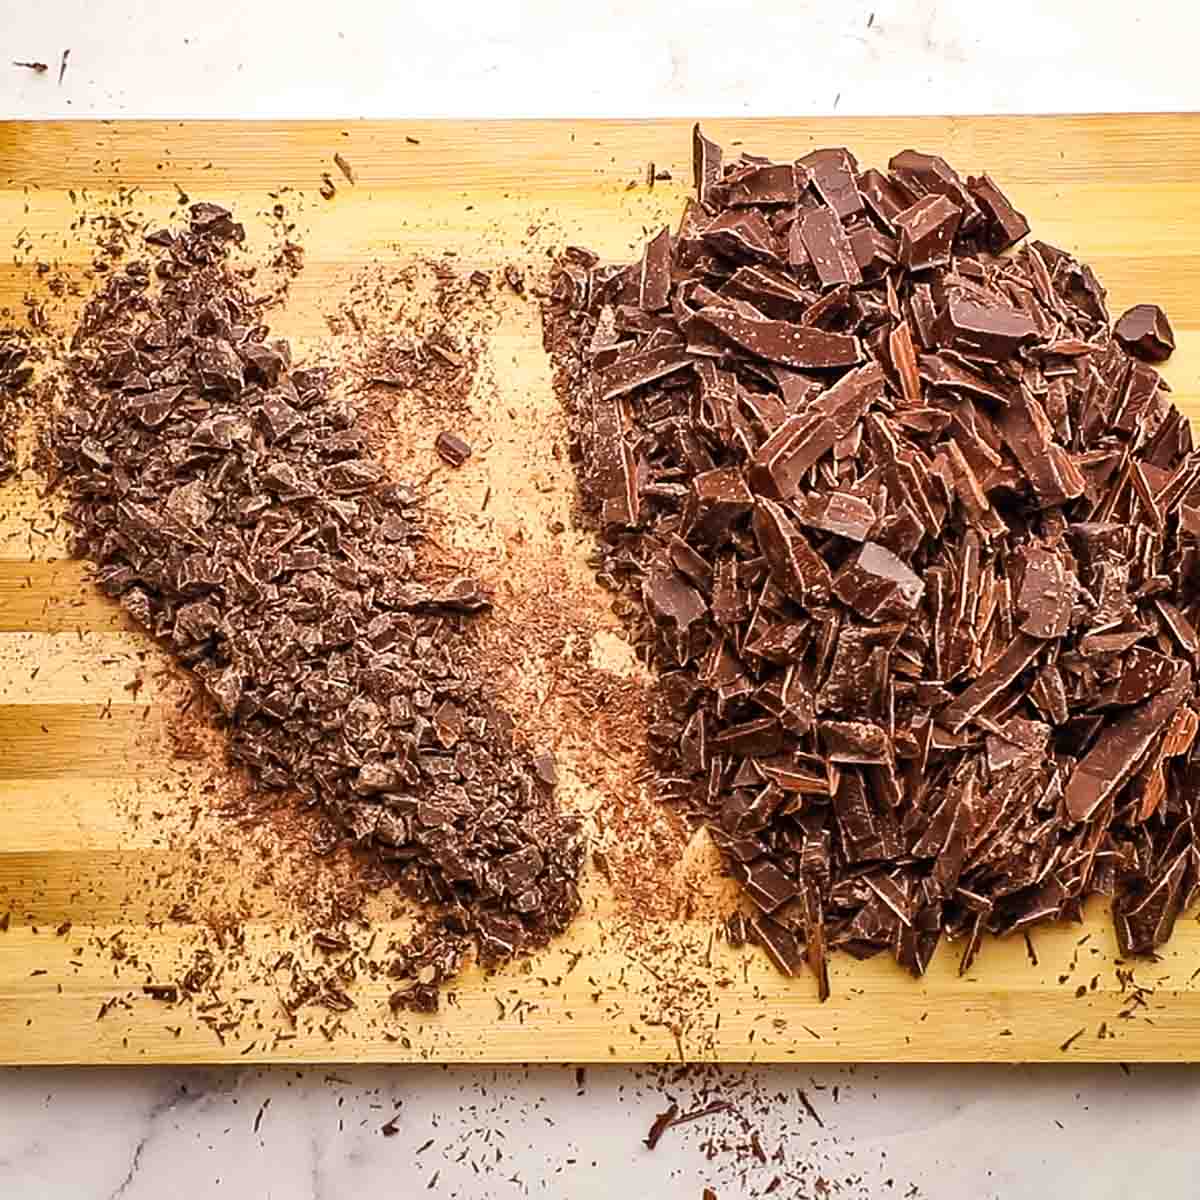
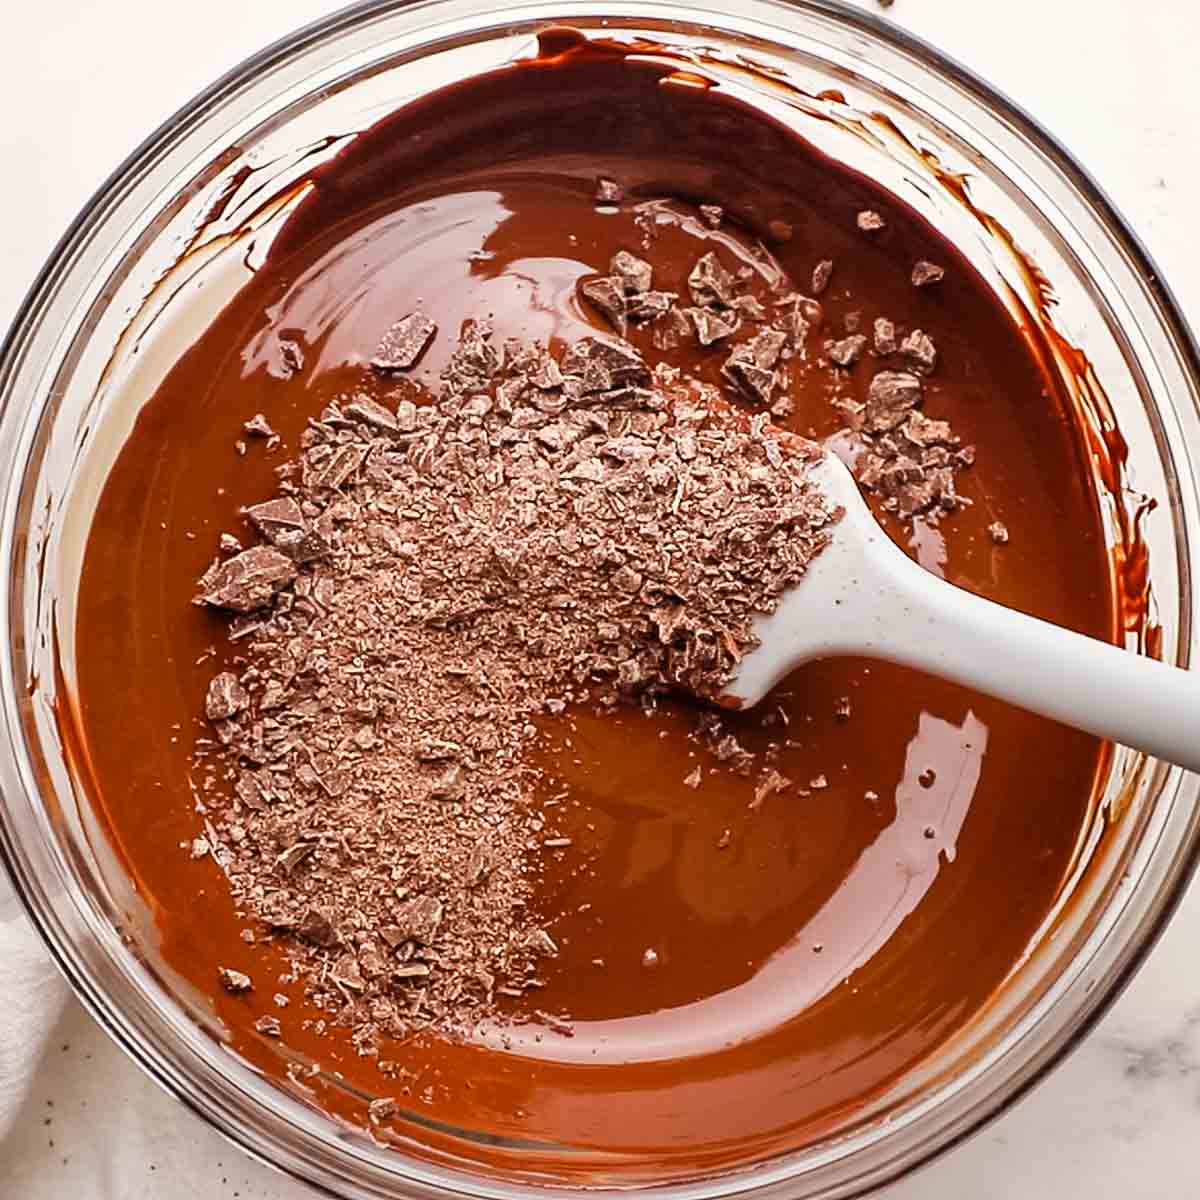
- Coarsely chop 3/4 of the chocolate, and very finely chop the remaining 1/4. Place the coarsely chopped chocolate in a microwave-safe bowl, and set the remaining 1/4 of the chocolate aside.
- Transfer the bowl of chocolate to the microwave and melt the chocolate slowly on full power, starting with a 30-second burst or two, stirring after each one. Decrease to 10-15 second bursts, continuing to stir after each one until the chocolate is about 70% melted.
- Stir the chocolate until it’s completely melted.
- Throw a handful of the remaining chocolate into the bowl, and stir vigorously, scraping the sides of the bowl with the spatula as you go. You want to really agitate the chocolate, while keeping a smooth stirring motion, to avoid creating air bubbles.
Continue to add more chocolate, stirring to melt completely after each addition, and reducing the amount of chocolate in each addition, until you find that it is no longer completely melting. Here, you can pop it into the microwave for no more than 3-4 seconds, just to warm it up enough to get rid of any unmelted lumps.
- Stir the chocolate vigorously for 2-3 minutes, until completely smooth and shiny. Test the temper by dipping a metal spoon into the chocolate and setting it on the counter. After about 5 minutes (or sooner), it should set up hard and shiny, with no streaks or swirls.
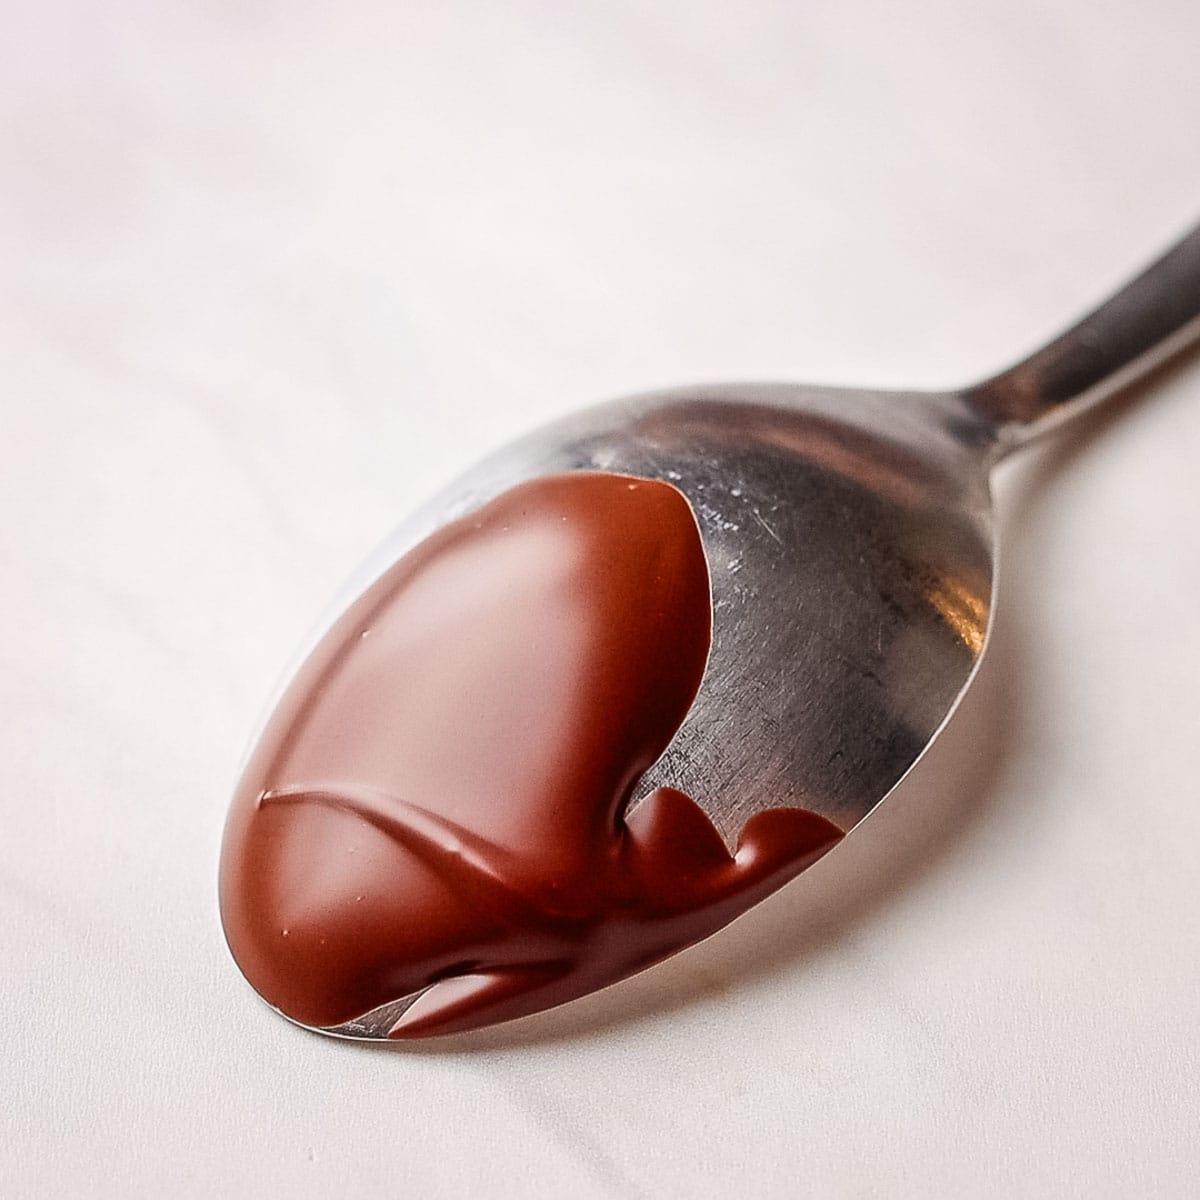
NOTE: If it does not start to set up after 5 minutes or so, avoid the temptation to pop the spoon into the fridge has this will give you misleading results. It is probably just that the chocolate has not cooled down enough yet. Instead, add a bit more chocolate and keep stirring. Try the spoon test again.
Dipping dark chocolate truffles with caramel
Hopefully you now have some perfectly tempered chocolate and you’re ready to start dipping your dark chocolate truffles.
Take your truffles out of the refrigerator a few minutes before dipping as the chocolate coating may crack as it sets if the truffles were too cold when they were dipped.
TIP: Since it can take a while to dip all those truffles, I like to heat up a dish towel in the dryer and wrap it around the bowl while I’m working. This helps keep the chocolate at a good working temperature for longer. Stir it periodically while you’re working, making sure to scrape the sides of the bowl.
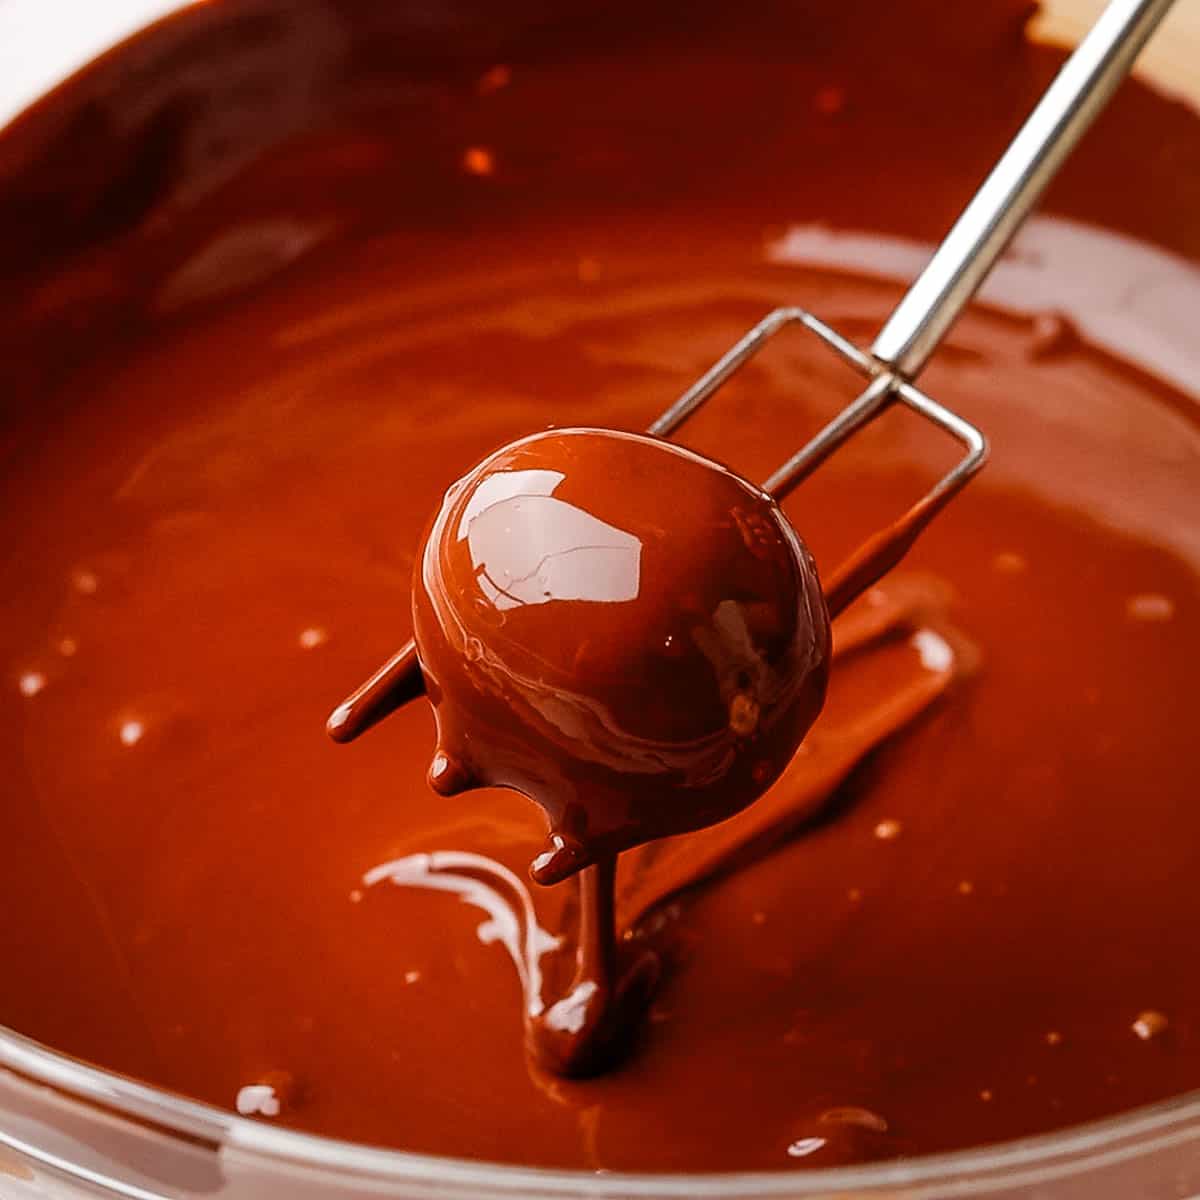
- Prepare a large baking sheet by lining it with wax paper. Dip your dark chocolate truffles, working as quickly as possible into the tempered chocolate. It really helps to have these tools for dipping, but a regular fork will work too.
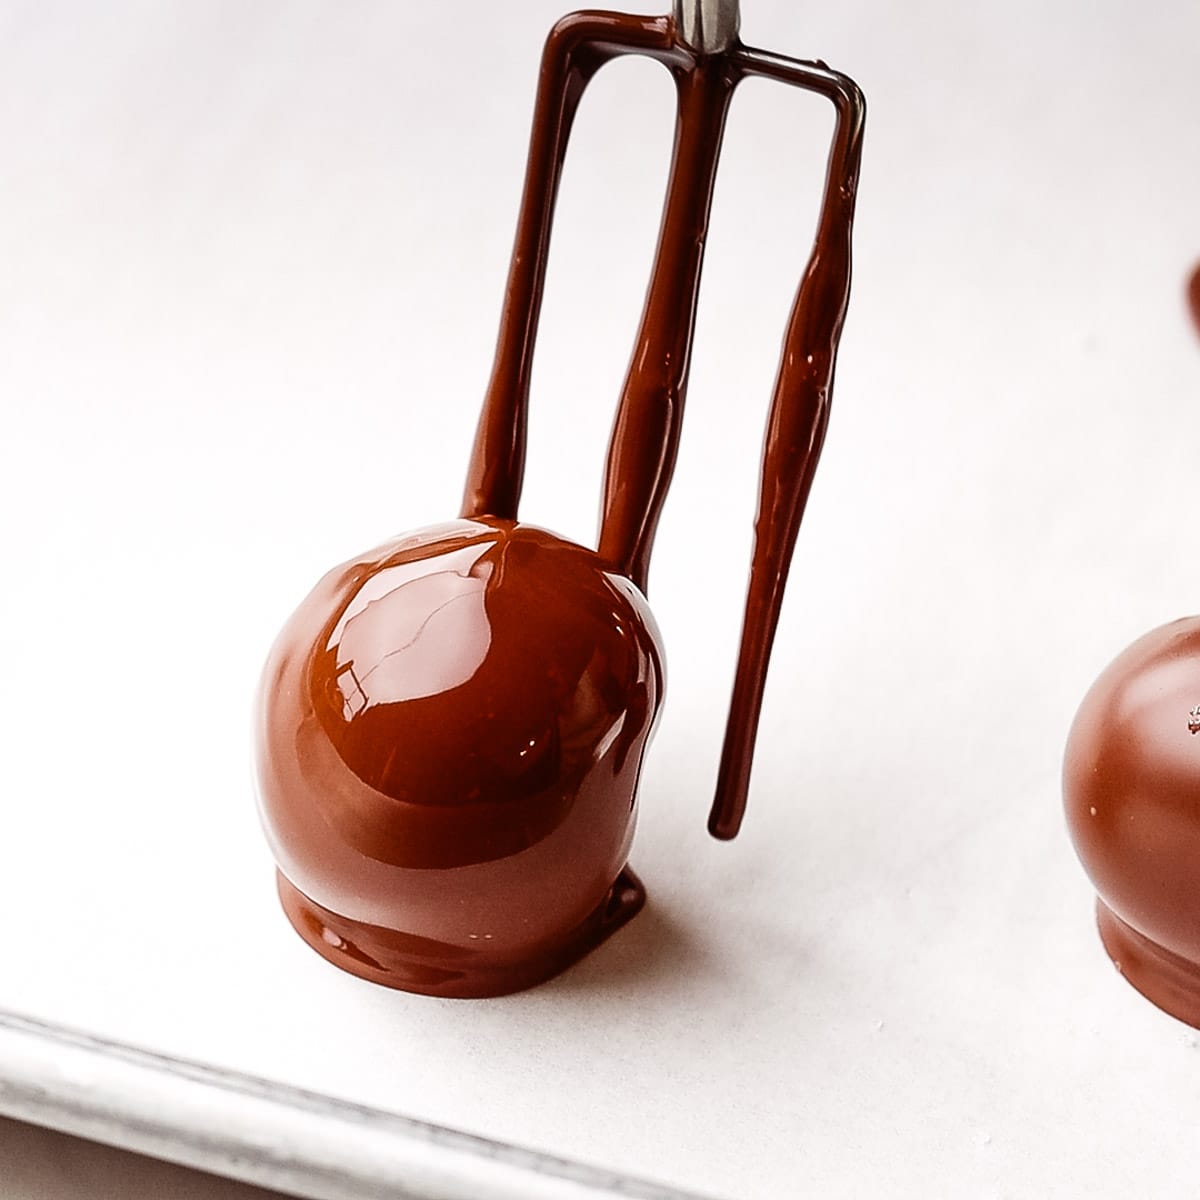
- Set the truffles down on the prepared baking sheet and sprinkle immediately with flaky sea salt before the chocolate sets.
These dark chocolate truffles with caramel are guaranteed to impress! I love giving the gift of food at the holidays. If you’re looking for other ideas, here are some more easy treats you might like!
More great ideas for edible gifts
Sweet and Salty Chocolate Bark

Dark Chocolate Caramel Truffles
Ingredients
- 1 1/4 lbs good quality dark chocolate, divided.
- 2/3 cup heavy whipping cream
- 1/4 cup + 1 tablespoon granulated sugar
- 2 tablespoons water
- 1 teaspoon flaky sea salt
Instructions
Make the filling
- Melt 8 oz (227 grams) of the chocolate in a medium bowl in the microwave, in 30 second increments, stirring throughly after each one.
- Bring the cream to a simmer in a small saucepan.
- In the meantime, combine the sugar and water in a medium saucepan over medium heat. Cook, swirling the pan gently occasionally until the liquid becomes a medium amber color. Be careful not to burn.
- Remove from heat, and – slowly and carefully because it will bubble up – whisk the warm cream into the sugar, continuing to whisk until smooth. If there are any sugar lumps, place the pan back over the heat and whisk until the lumps are melted.
- Add the caramel to the melted chocolate and whisk until smooth. Add a 1/4 teaspoon of fleur de sel and continue whisking until incorporated.
- Pour the ganache into a shallow bowl and leave to set up overnight at room temperature, or cool to room temperature and set in the fridge for about an hour until firm enough to roll. If it's too firm, let it soften a bit at room temperature before rolling.
- Scoop ganache and roll into 3/4 inch balls. It may be helpful to coat your hands in cocoa powder while you do this, since the ganache can be sticky.
- Place the balls onto a cookie sheet and refrigerate until firm. Take them out again and let them sit at room temperature for a few minutes. If you plan to dip them in tempered chocolate, the chocolate coating may crack a bit if the balls are too cold when you dip them. (Not really a huge deal)!
Temper the coating and dip the truffles
- Coarsely chop the remaining 12 oz of chocolate, reserve 1/4 of it and finely chop that portion. Transfer the coarsely chopped portion to a microwave-safe bowl.
- Heat the chocolate on full power for 30 seconds and stir. Heat another 30 seconds and stir again, scraping the sides and bottom of the bowl with a rubber spatula.
- Continue heating the chocolate in bursts of 5-10 seconds, stirring vigorously after each one, until the chocolate is 70% melted. Stir until the chocolate is fully melted from the residual heat.
- Once the chocolate is fully melted and smooth, add half the FINELY chopped chocolate and stir until fully melted.
- Add half of the remaining finely chopped chocolate, and stir again until fully melted. Keep adding chocolate, 1 or 2 tablespoons at a time and stirring until melted.
- When it starts to take a few minutes of stirring before the added chocolate fully melts, test the temper by dipping the back of a metal spoon into the chocolate and setting it down on the counter. It should start to set after about 5-8 minutes. Keep stirring while you wait. If it has not set, add a little more chocolate, stir until melted and try again. Your chocolate is tempered when it sets with a beautiful shine and no streaks.
- Using a dipping fork, or a regular fork, dip each truffle, rolling it around to cover completely, tap the for against the side of the bowl to remove excess chocolate, and put on the prepared baking sheet. Sprinkle with a little flaky sea salt before the chocolate sets.

Recipe says to add carmel. I do not see carmel listed in the ingredients. Please advise as I am unsure what to use. Thank you.
Hi Diane! This would be the caramel that you made in steps 2-4 :). Let me know if you need any more help!
That creamy filling kills me! Just perfect.
Thanks Sabine! The filling really melts in your mouth. Delicious contrast with the sprinkle of salt :). What a beautiful blog you have, by the way!