How to Temper Chocolate in the Microwave – The Ultimate Guide
This post contains links to affiliate websites, such as Amazon, and we receive an affiliate commission for any purchases made by you using these links. We appreciate your support!
If you’ve ever struggled to get glossy, streak-free, snappy, perfectly tempered chocolate, learn this quick and easy method for how to temper chocolate in the microwave WITHOUT a thermometer!
If you’ve ever been intimidated by the process of tempering chocolate, or had disappointing results, this is the post for you!
Years ago, I got it in my head that I wanted to start a business making homemade candy bars, which meant I needed to learn how to temper chocolate. I bought all the books on candy-making I could get my hands on, and immersed myself in reading all about temperature ranges and crystal structure.
Then I tried every method of tempering chocolate, (including the promising-sounding food processor method!). And failed. Miserably. Over and over.
I got dull, brittle chocolate, soft chocolate, streaky chocolate, spotty chocolate… it was all around NOT working out. I definitely shed a lot of tears. I abandoned the candy bar idea.
And then years later, I decided to try tempering chocolate again, this time on my own, using the knowledge I had gained, but more importantly, following my instincts. I figured out what was important about the process (stirring and more stirring!), and what I didn’t actually need to worry about (a candy thermometer, a tempering machine, a marble slab).
That’s why I decided to create this ultimate guide for how to temper chocolate in the microwave, and hopefully save you some tears. Note that this post contains A LOT of information, which I’ve tried to make as clear and concise as possible.
Tempering chocolate in the microwave is EASY, I promise. But it’s still important to understand what you’re doing and why, as this will help you troubleshoot any issues. This is the only method I ever use now.
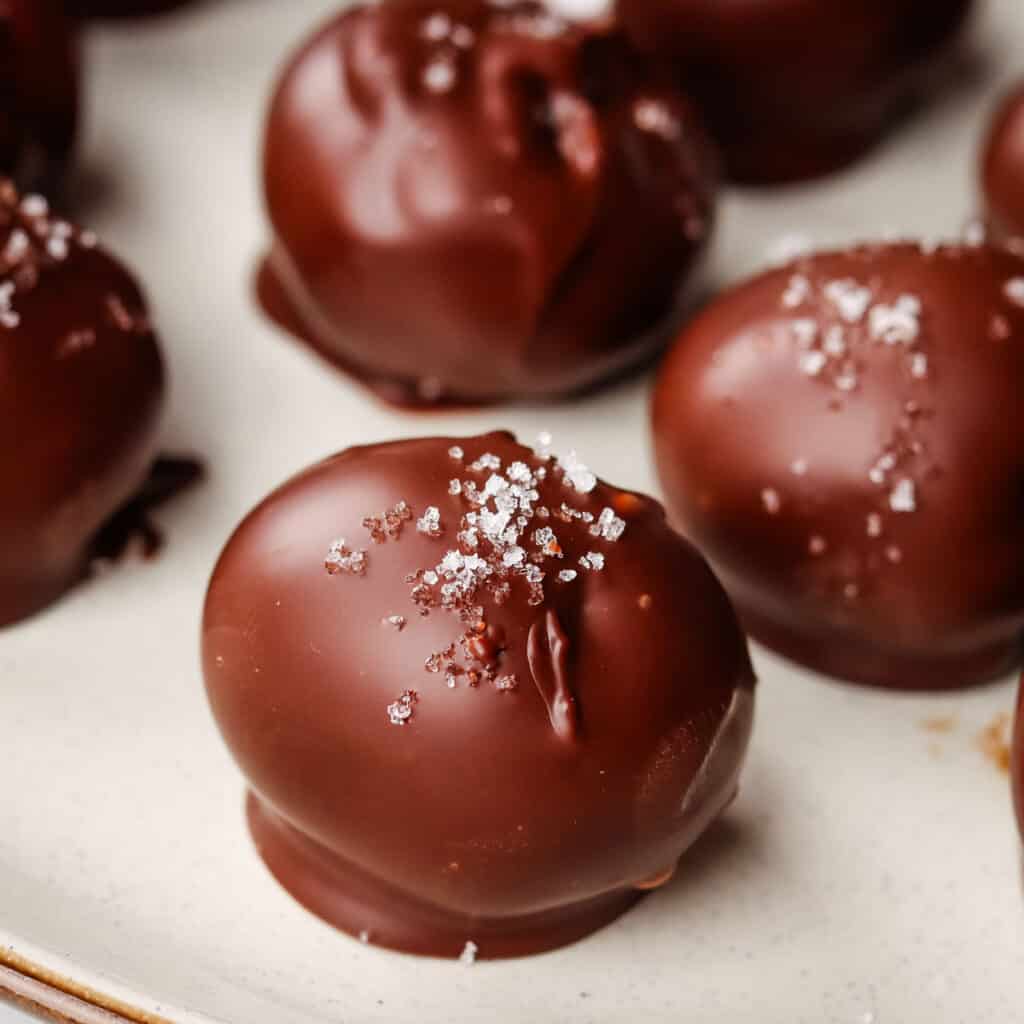
Dark Chocolate Caramel Truffles
What is chocolate tempering?
Tempering chocolate involves a fairly complex chemical process that is well covered in this article. I won’t discuss it in detail here, because you don’t really need to know the ins and outs to be able to temper chocolate successfully using my method.
Basically, tempering chocolate involves heating the chocolate to a target temperature range, and cooling it again in a specific way, in order to stabilize it so that it hardens back to its original beautiful shine and snap.
There are several ways to temper chocolate, and the easiest is definitely the seeding method. The seeding method involves heating chocolate, and then introducing smaller pieces of UNmelted chocolate into melted chocolate in order to “seed” the melted chocolate with the beta crystals needed to stabilize and temper it. This is the method we’re using here.
Why temper chocolate?
An important question! If you’ve ever melted chocolate for dipping or drizzling, you may have noticed that the texture and appearance after the chocolate hardened back up was less than ideal.
Maybe it was soft and melted in your hands, maybe it was dull, or had oily-looking streaks or white splotches. Maybe it had a chalky texture when you bit into it. These are all qualities of untempered chocolate.
Properly tempered chocolate is hard, shiny, and snappy. Just like the bars you buy at the store. And it does NOT require refrigeration to remain that way.
Tempering chocolate is for coating, dipping and drizzling, in other words when the chocolate serves a decorative function.
I also prefer to temper chocolate for bark, like in the sweet and salt chocolate bark below. When dipping homemade candy like these caramel truffles, you will absolutely want to use tempered chocolate if you want to give them a professional look!
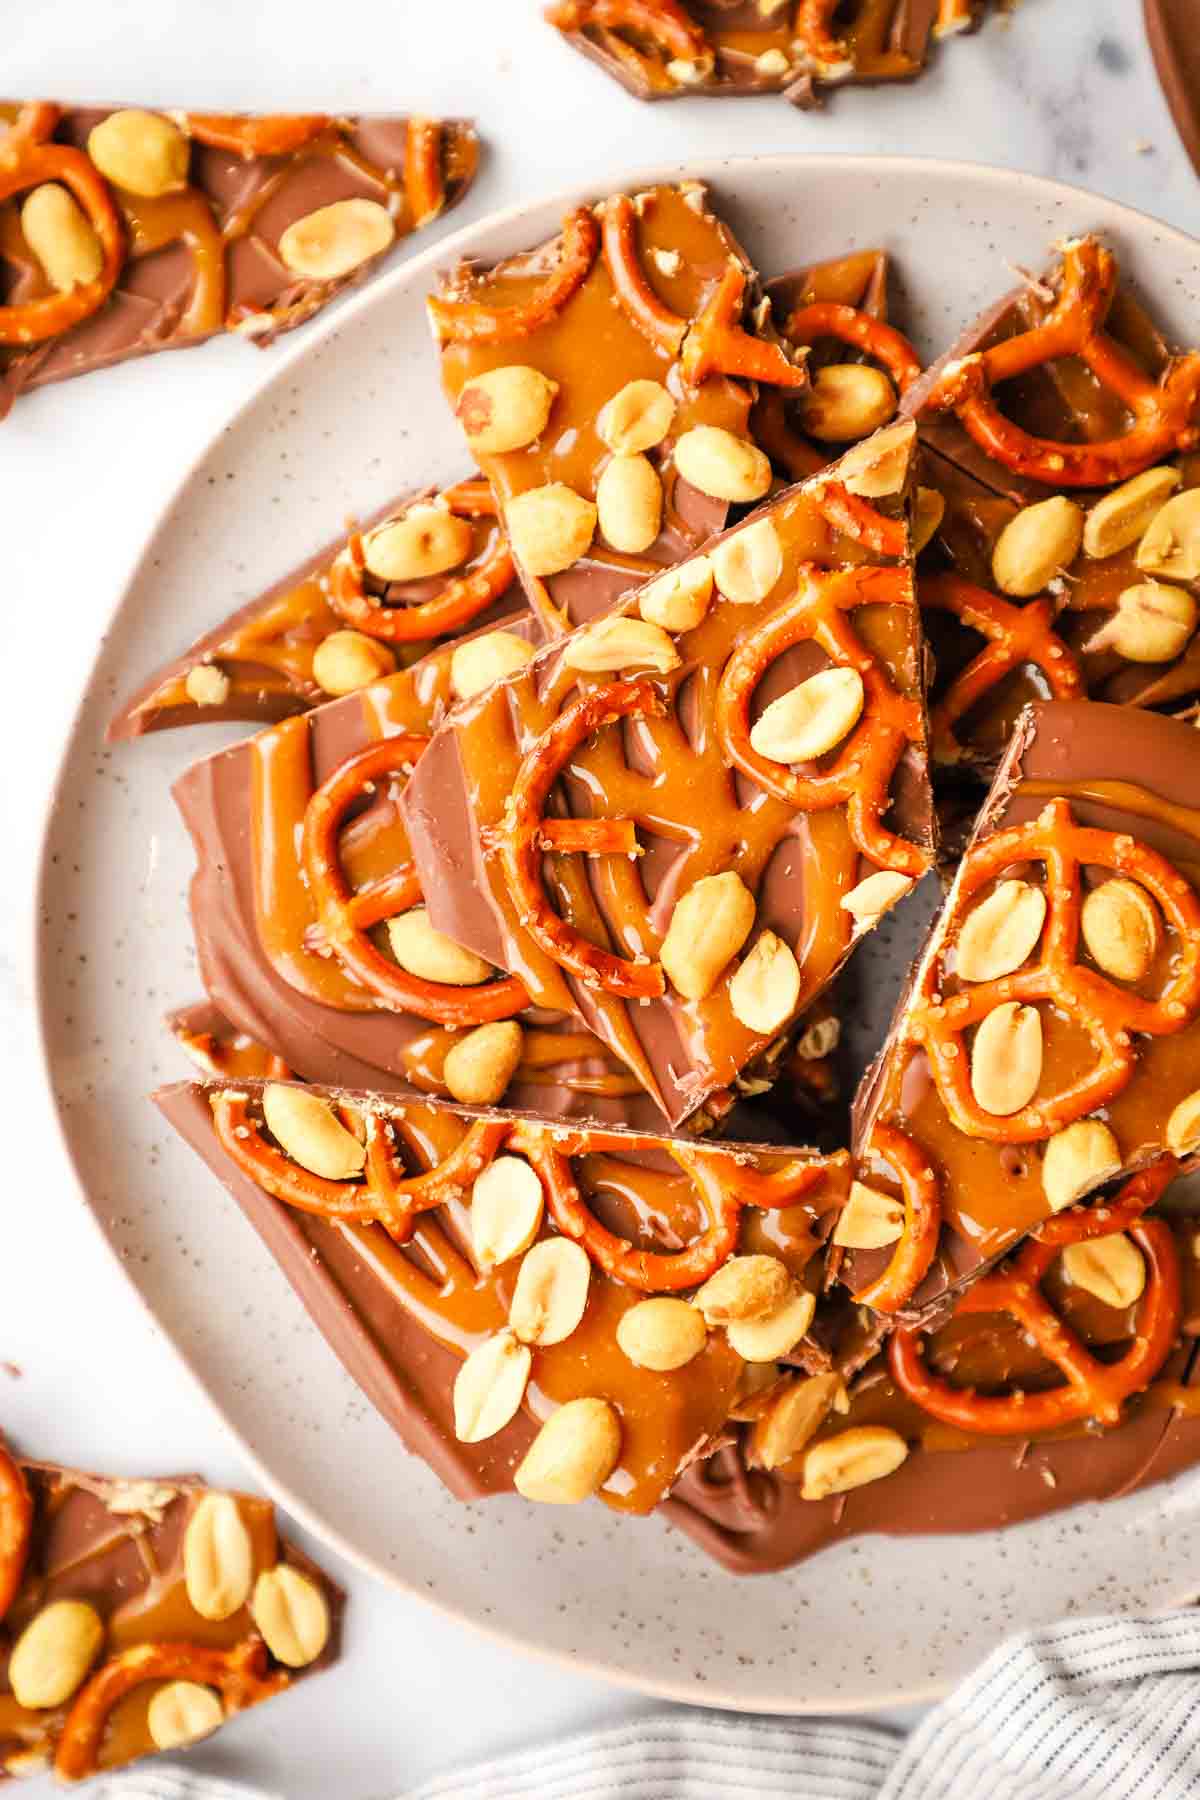
Sweet and Salty Milk Chocolate Bark
When is tempering chocolate not necessary?
You do not need to temper chocolate when melted chocolate is used as an ingredient in baking, or for making frosting or ganache. Regular melted chocolate will work perfectly fine for that.
Why temper chocolate in the microwave?
If you’re wondering WHY I consider the microwave to be the best way to temper chocolate, there are MANY important reasons. The top 3 are:
- Control over heat: My early attempts at tempering chocolate by melting it in a double-boiler, even when using a thermometer, were almost certainly ruined by overheating. Heating chocolate in the microwave means you get to control exactly how long, and at what intensity the heat is on for.
This helps to ensure that the temperature of the chocolate does not exceed 130 degrees f, at which point the cocoa fat will separate from the cocoa solids, and the chocolate will burn.
- You can temper small quantities easily: Using a double-boiler, it is much more difficult to temper small amounts of chocolate (under 1 lb), because of the above-mentioned risk of overheating. A small quantity of chocolate will melt (and overheat) very quickly, as the bowl in a double boiler quickly gets very hot. In the microwave, I regularly temper as little as 4 ounces at a time for drizzling on cookies and making chocolate decorations.
- No risk of contact with water: Water is the enemy when it comes to chocolate. Chocolate is a completely dry substance, even when melted, and the introduction of even 1 drop of water will make it seize up into an unusable lump. A double-boiler creates steam, increasing the risk of water accidentally getting into the bowl.
What type of chocolate can I temper?
Any pure chocolate – dark, milk, or white chocolate – can be melted and tempered. Note that when you purchase chocolate in bars, blocks, or callets, it is already tempered. The goal here is to melt the chocolate and return it to its tempered (but liquid) state to be then re-molded in any way you like.
Pure chocolate is usually sold in blocks, bars, or callets. Callets, which are small pieces, can be melted whole, but chocolate bars and blocks need to be chopped up before melting and tempering.
If you see the word “couverture” on the package, this indicates that the chocolate is suitable for tempering. Chocolate used by professionals will include this term on their packaging but you probably won’t see it on consumer brands you find at the grocery store, even though you can still temper them.
Which brands are best for tempering?
Although I buy many different chocolate brands, my main go-to, which is available on Amazon and in pro shops is Callebaut, which you can get in callets and large blocks. Another well-loved chocolate at a higher price point is Valrhona. If you work with chocolate a lot, these brands are sold in larger quantities mainly to professionals, and represent a good value.
At the grocery store, chocolate suitable for tempering is mainly sold in bar form, in the baking aisle. Brands such as Ghirardelli, Bakers, Lindt, Dove, Scharffen Berger, and E. Guittard, all make high quality chocolate, and store brands like Trader Joe’s and Costco often offer a good value too. Go with your taste buds, and budget on this one.
Most grocery store chocolate chips are not ideal for tempering, as they are formulated especially to help the chips keep their shape when melted. That said, if the chips are made of pure chocolate, like Callebaut chips (also known as callets), they can be melted and tempered.
Want to SAVE this recipe?

What if I don’t feel like tempering chocolate?
If you don’t want to temper chocolate, you can use melting wafers instead. These are also known as “candy melts” “candy coating”. “chocolate bark coating” or “confectionionary coating”.
Melting wafers, made by Wilton and other brands, do not contain real chocolate, but look and melt like real chocolate. The taste is less rich and complex, but they are a popular alternative to tempered chocolate, and are pretty easy to work with.
I personally feel that, using this easy method for how to temper chocolate in the microwave, tempering real chocolate isn’t much more trouble than melting wafers, and tastes a million times better!

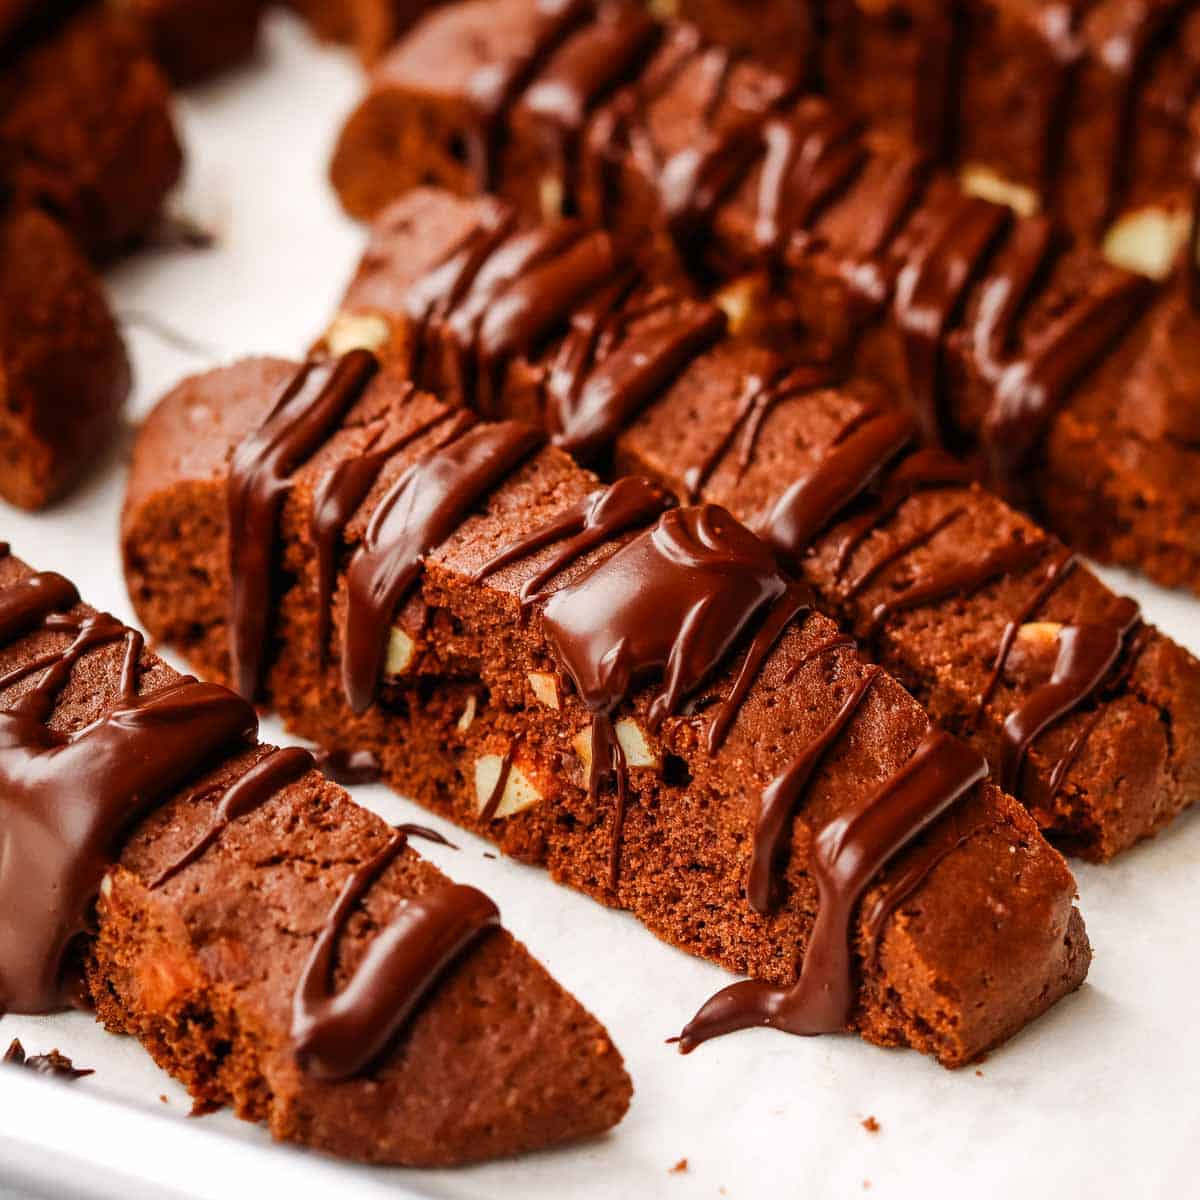
Chocolate-dipped rice krispie treats
Now let’s talk about the how to temper chocolate in the microwave (AKA the easy way)! And for an extra visual, check out the video in the recipe card!
How to temper chocolate in the microwave
- Decide how much chocolate you will need. For dipping, you will likely want to have at least 1 lb. For drizzling, a small amount (4 oz or so) should suffice, since you can use it all, and do not need to hold it in temper for an extended amount of time.
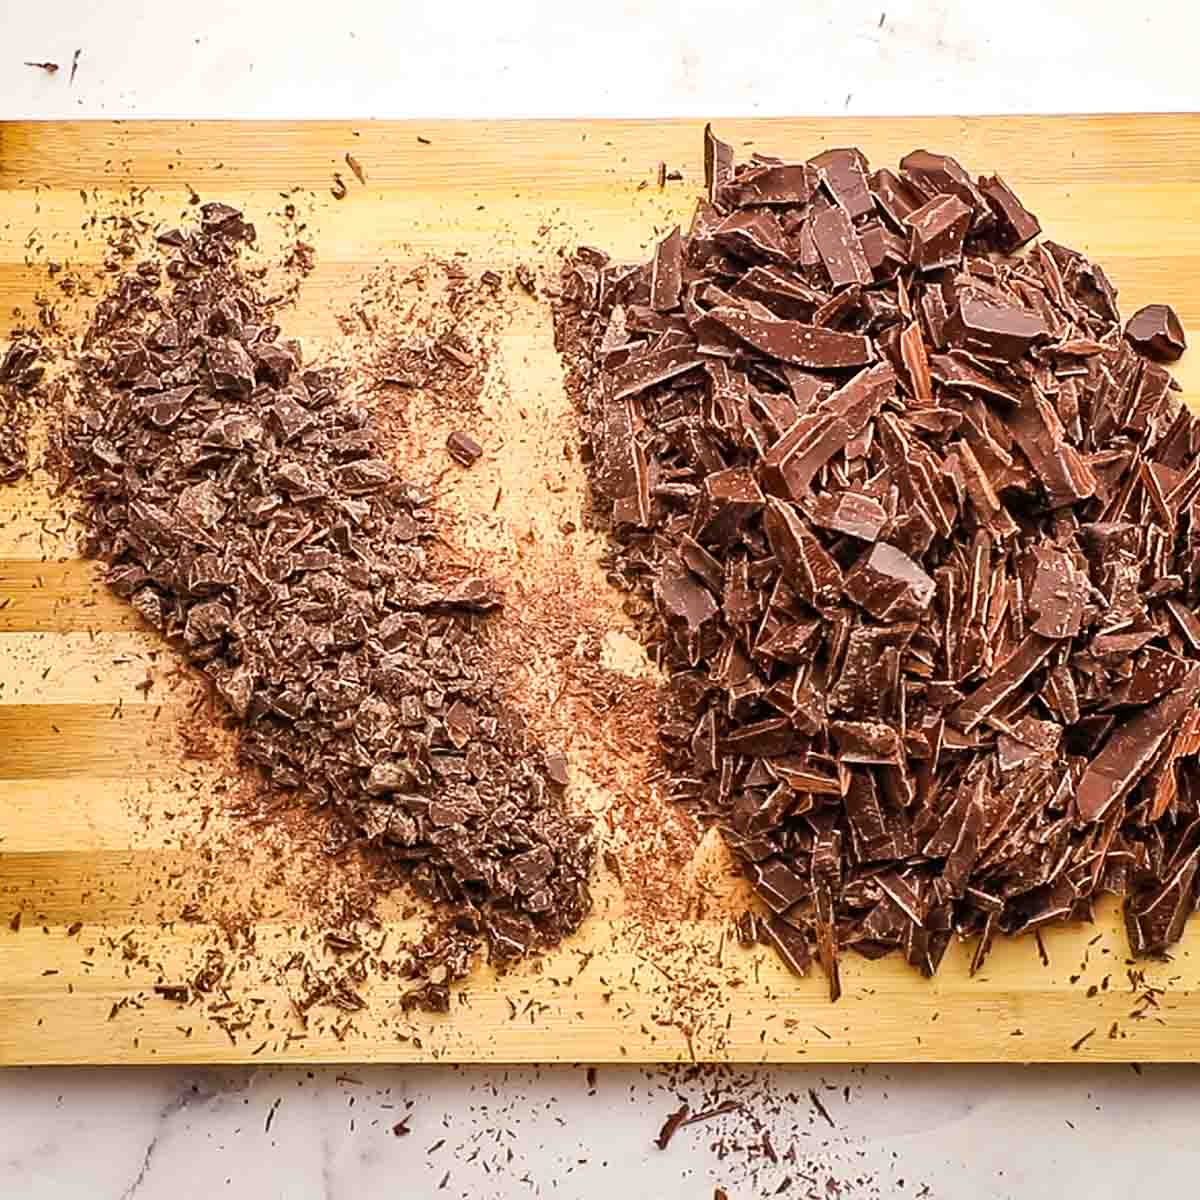
- Roughly chop all of your chocolate with a sharp or serrated knife.

- Set aside 1/4 of the chocolate and chop it very finely.
- Place the coarsely chopped chocolate in a microwave-safe bowl (make sure the bowl is very clean and fully dry. Even a drop of water will cause it to seize).

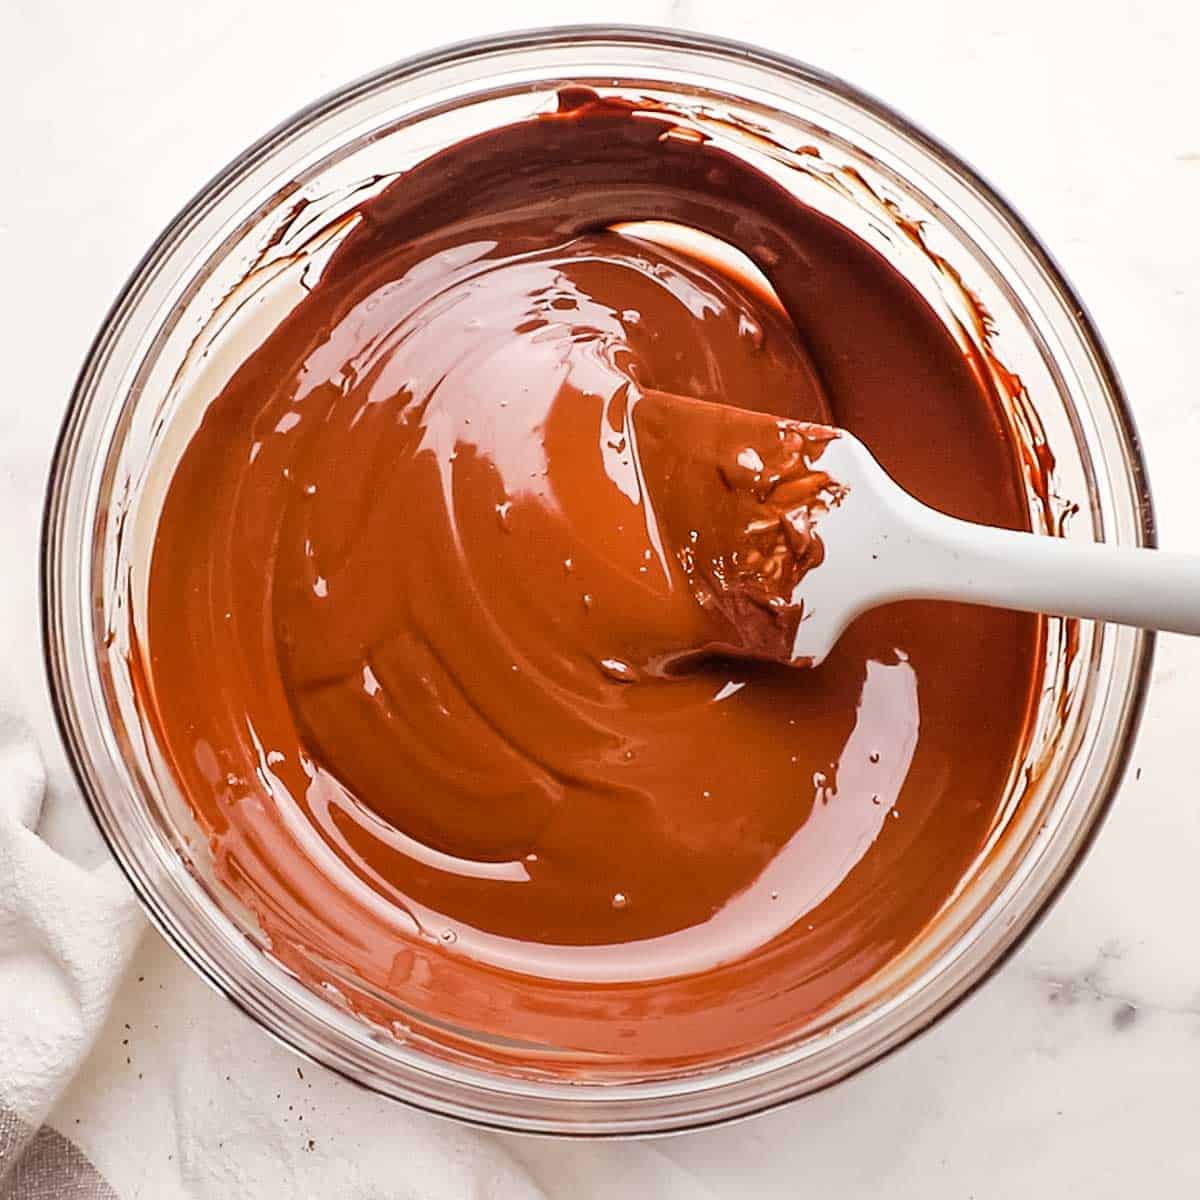
- Transfer the bowl of chocolate to the microwave and melt the chocolate slowly on full power, starting with a 30-second burst or two, stirring after each one. Decrease to 10-15 second bursts, continuing to stir after each one until the chocolate is about 70% melted. Note that milk and white chocolate have a lower melting temperature and will require less time to melt.
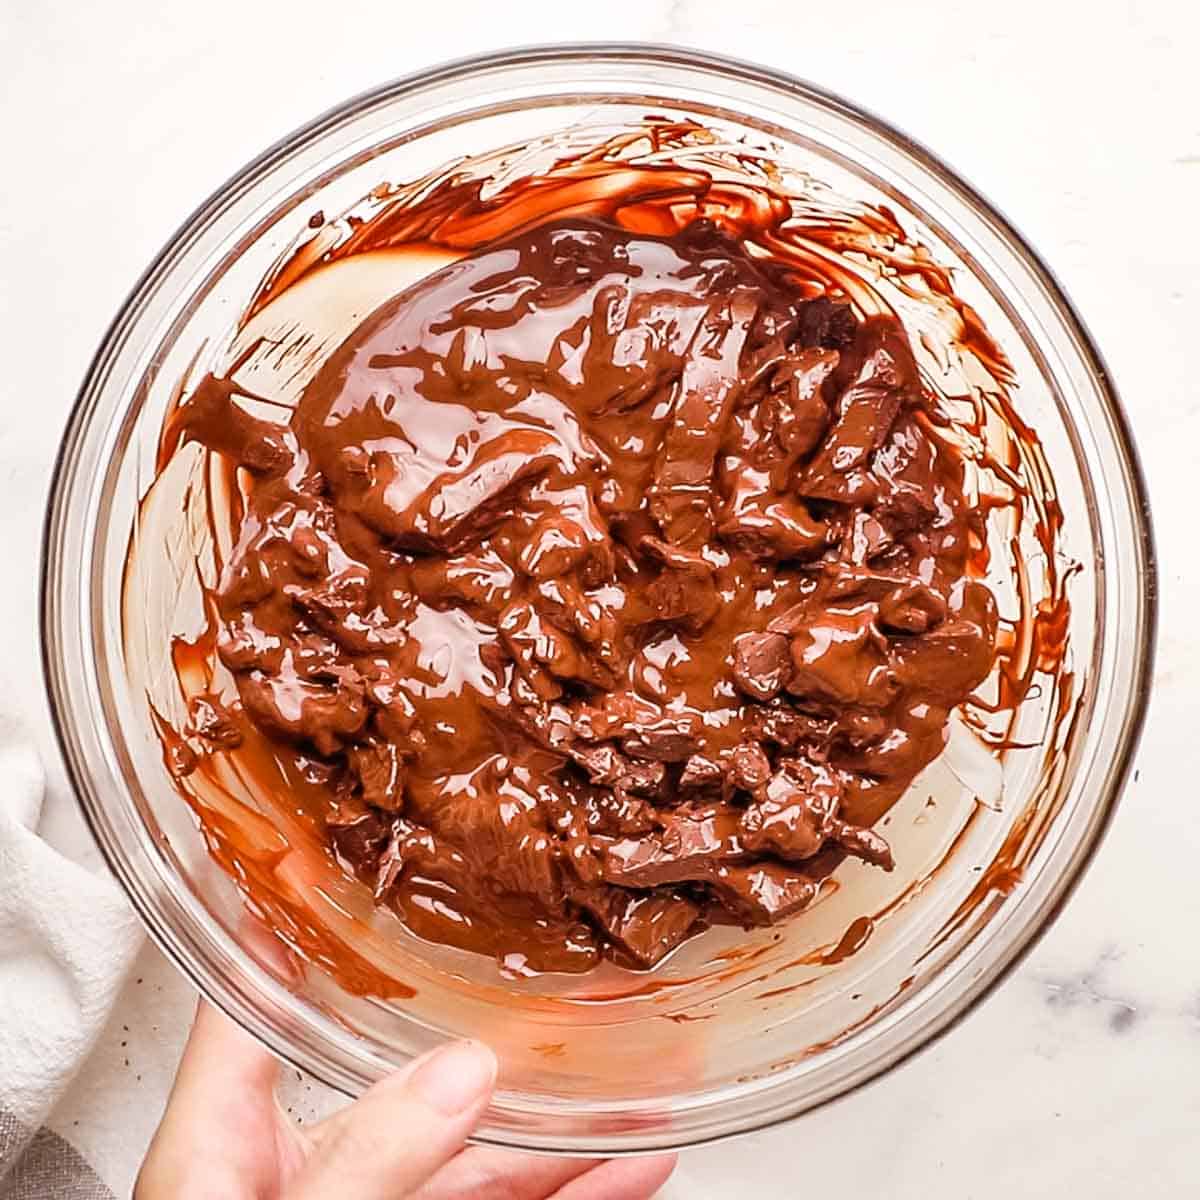
- Stir the chocolate until it is completely melted. If you are still left with some unmelted pieces after stirring for a minute or two, give the chocolate another 5 seconds in the microwave until it fully melts from stirring. This process ensure the chocolate reaches the right temperature, without need for a thermometer.
- To the melted chocolate, add about half of the reserved finely chopped chocolate. Stir vigorously with a rubber spatula, scraping the sides and bottom of the bowl, until completely melted and smooth.
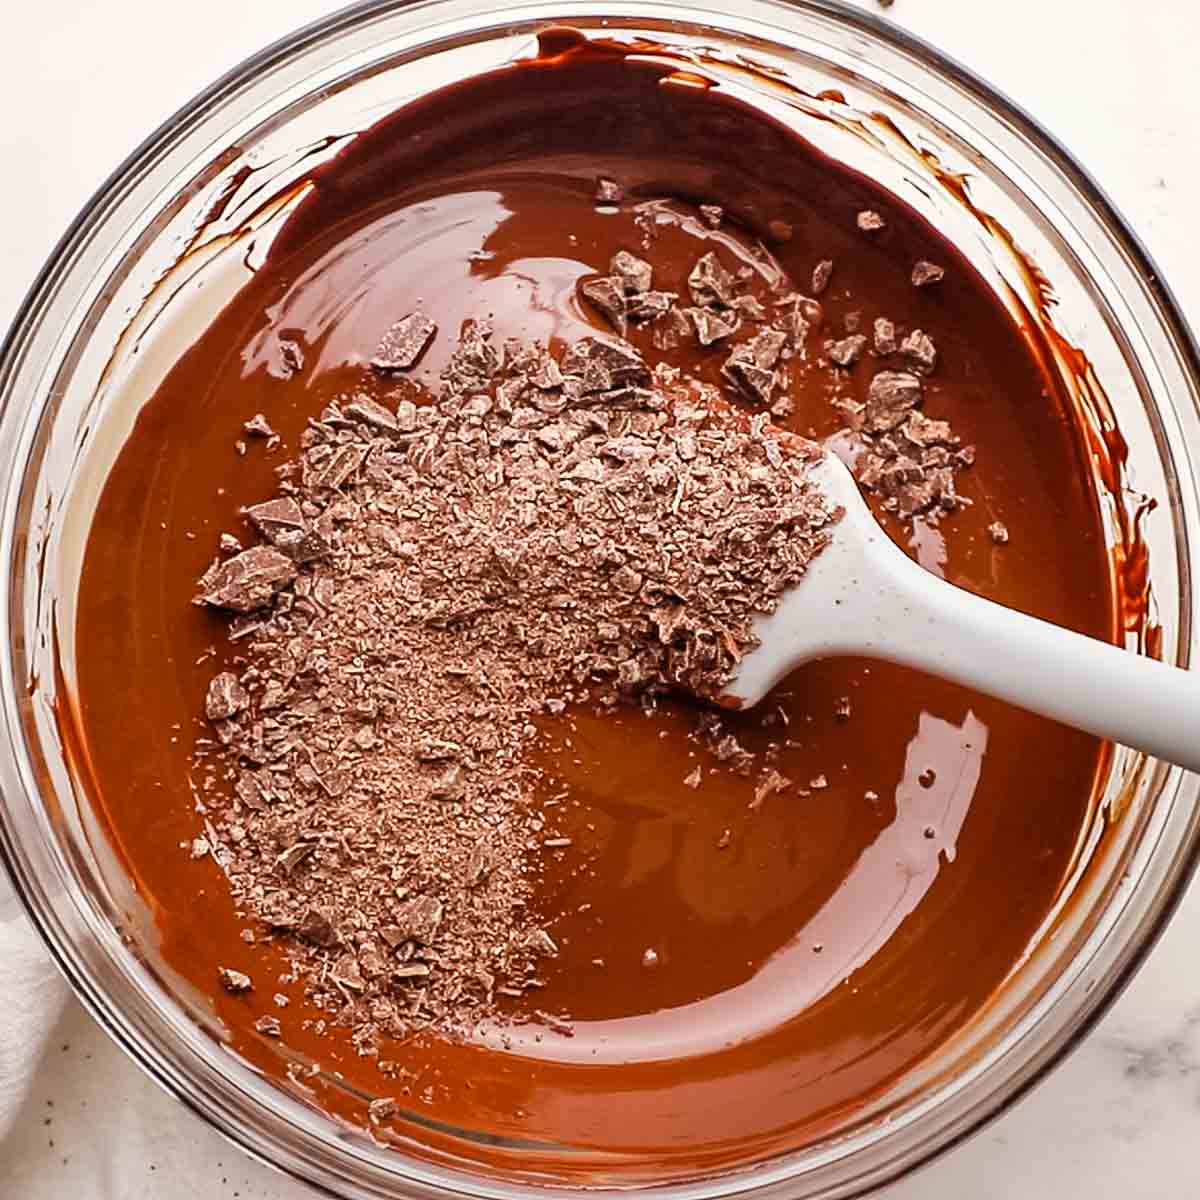
- Add half of the remaining chocolate again, and stir vigorously until fully melted.
At this point, if you’ve been stirring for a couple of minutes and there are still some unmelted pieces, place the bowl in the microwave again for 5 seconds and stir again until melted (repeat if necessary).
On the other hand, if the chocolate is melting quickly as you stir, keep adding chocolate, until it starts taking a little while to melt fully.
Keep stirring vigorously after it’s melted, as the chocolate cools. for about 4-5 minutes, slapping the chocolate up against the sides of the bowl, and scraping it back down as you stir. Avoid a “whipping” motion as this will introduce bubbles into your chocolate.
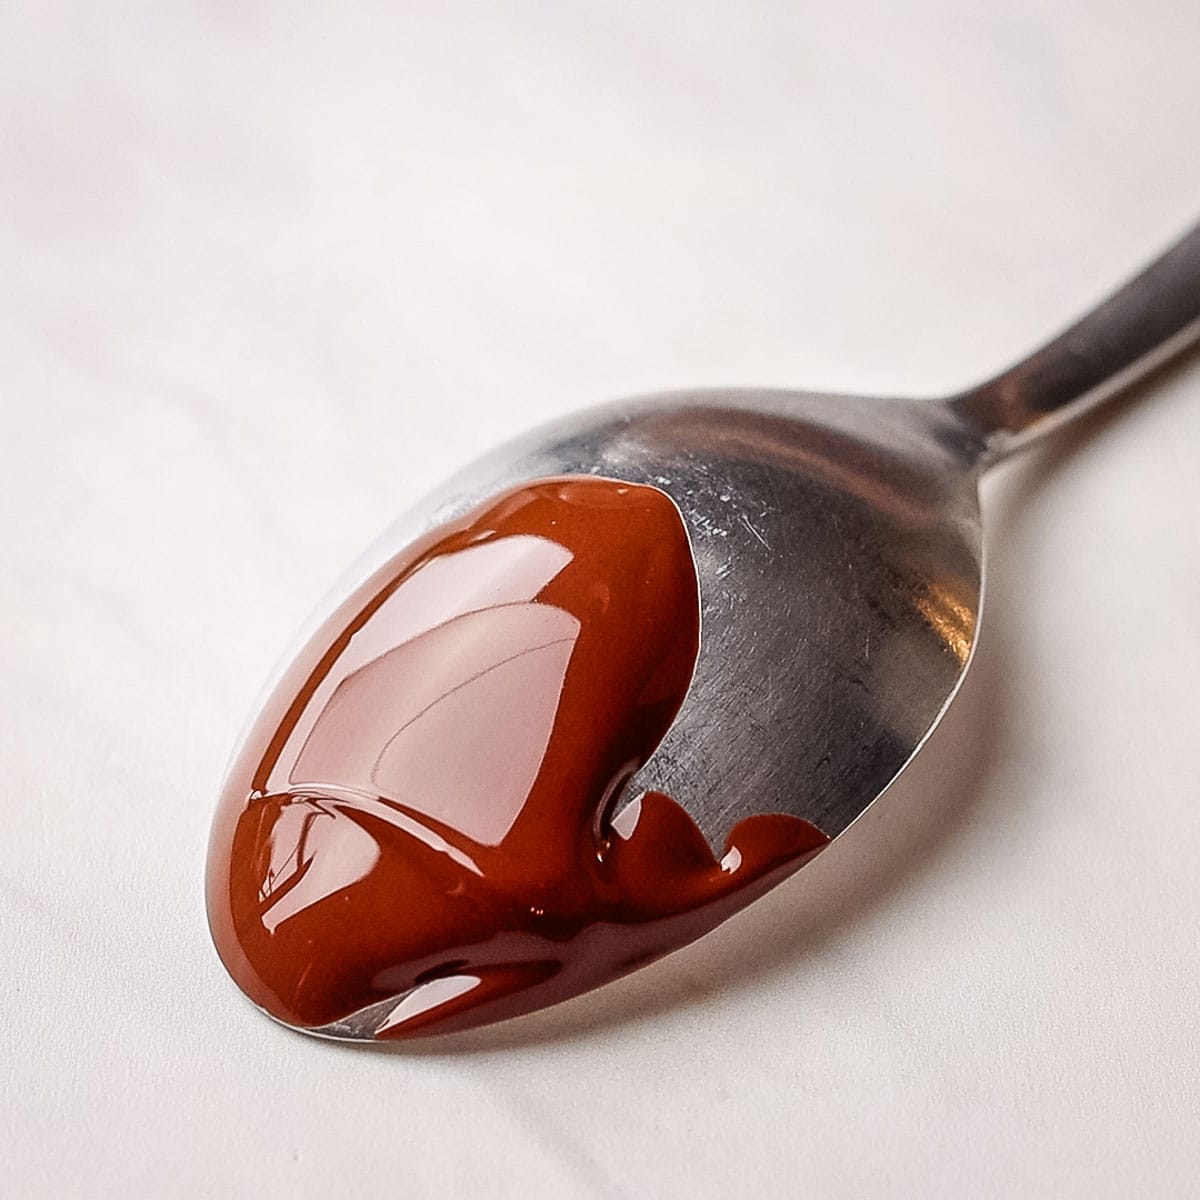
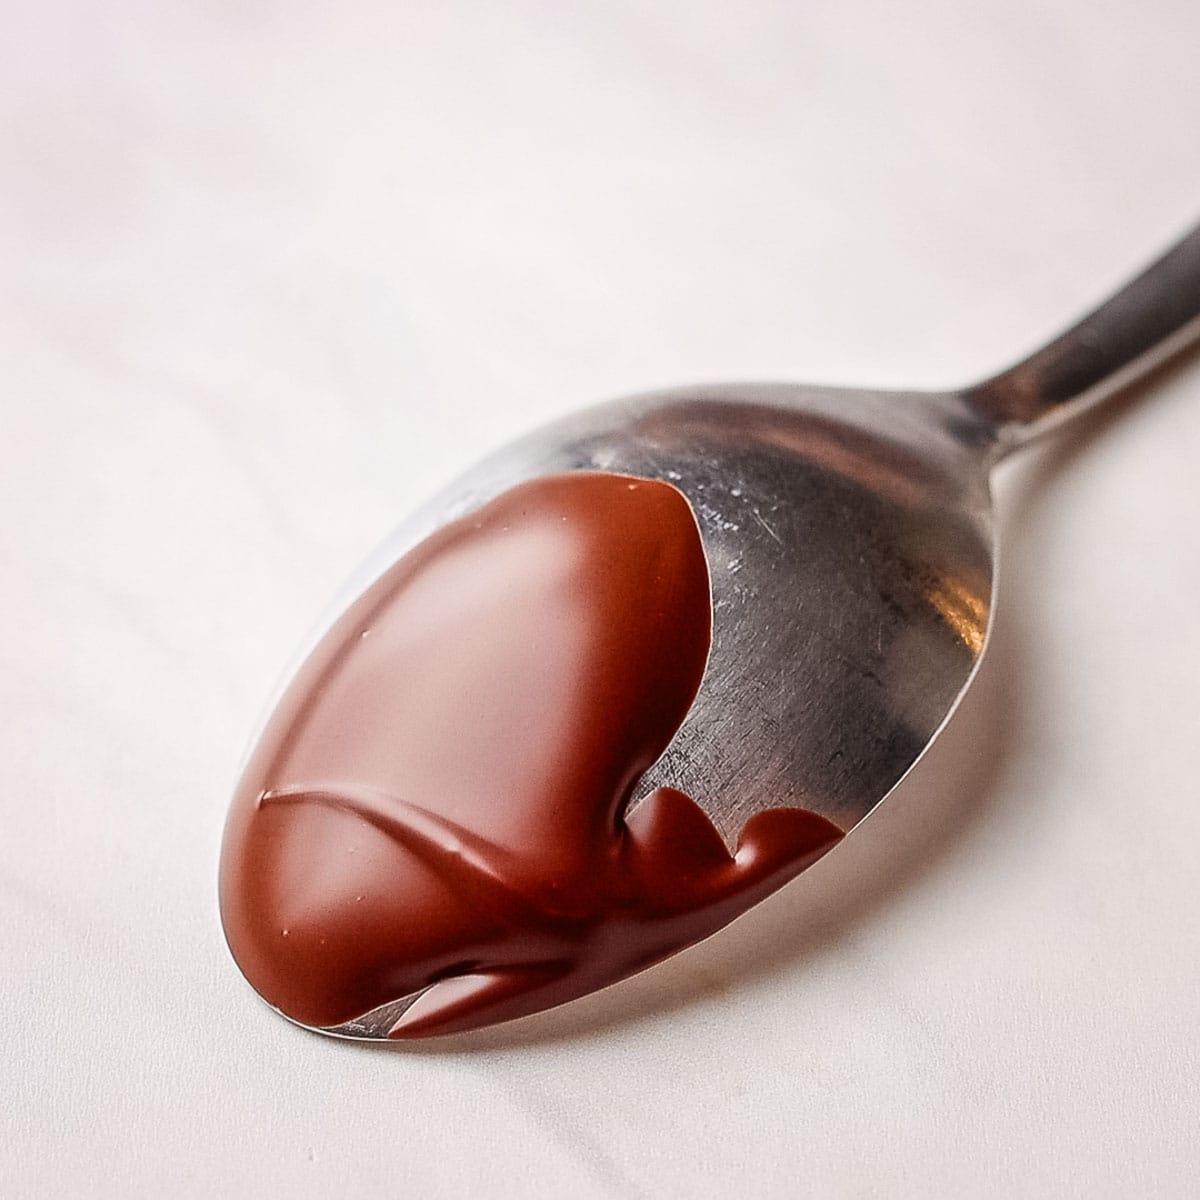
- Test the temper by dipping the back of a metal spoon into the chocolate and placing it down on the counter. If your chocolate is in temper, it will begin to harden and turn slightly matte after about 3-6 minutes (depending on the temperature of the room). While you wait, keep stirring the chocolate frequently. The idea is to cool the chocolate as you stir, to the optimal working temperature.
If after about 6 minutes the chocolate has not set up on the spoon, or has started to set but has some oily looking streaks in it, keep stirring, even adding a little bit more chocolate, and test again. This can take a long time, but be patient and keep stirring and testing! It gets quicker with practice.
If the chocolate is properly tempered, it will look shiny but dry, and perfectly smooth, like the spoon on the right.
When your chocolate is perfectly in temper, you are ready to start dipping or drizzling!
How to keep chocolate from hardening while you work with it
After working with it for a while, especially if you are dipping a lot of truffles for instance, you may find that your chocolate is starting to set on the sides of your bowl. If this happens, heat it again in the microwave for just a few seconds (5 or so) and stir it until it fully melts back up, scraping the sides, and keep going.
You can also wrap your bowl in a warm towel to keep it from setting up too quickly while you’re working. Some like to use a hair dryer to heat the sides of the bowl periodically. Any low indirect heat source can work.
A few extra tips for success
- Always temper more chocolate than you think you will need, especially if you are using it for dipping. Any extra chocolate can always be poured onto a piece of waxed paper, left to harden and then re-used!
- Stir and stir some more. Do not underestimate the importance of stirring. Stirring constantly as the chocolate melts and cools does not just help to melt the chocolate, but is critical to ensure a stable crystallization and a proper temper.
- Always test the temper on the back of a spoon before using it, to ensure it has cooled enough. It is only in temper once it has cooled, and been stirred enough.
Frequently Asked Questions about tempering chocolate
If you’ve used the chocolate for dipping, you will definitely find yourself with some leftover chocolate. Do not throw this out! just pour it onto a piece of wax paper and let it harden. This chocolate can be melted and tempered again, chopped up and stirred into cookie dough, or used in any other way you like.
This is known as “seizing”. The most common reasons for chocolate seizing as you melt it are overheating and the accidental introduction of water (for instance if your bowl was a little damp when you put the chocolate in, or if you were using a water bath to heat your chocolate and a drop of steam found its way into the bowl).
Unfortunately chocolate that has seized cannot be salvaged and you will need to start over with a new batch. It’s very important to melt it slowly, and ensure your bowl and stirring utensil are fully dry. If your chocolate seizes, you can stir in a little oil or chocolate and make a chocolate sauce, but that’s about the only thing you can do with it.
This is called blooming, and indicates the chocolate was not perfectly tempered. It is still perfectly edible, however! Note that even properly tempered chocolate can also bloom as a result of improper storage.
Chocolate should be stored at cool room temperature (65-68F) in a dry, dark place, like a cupboard or pantry.
There are plenty of ways to melt chocolate, the most common being a bain marie, also known as a “double boiler” (a bowl set over a pot of simmering hot water). I have personally found it too easy to overheat my chocolate using this method, which is why I use the microwave. I find I have a greater degree of control over how quickly I melt it with the microwave.
It depends! If your chocolate seized due to overheating or moisture, unfortunately no. If it has simply bloomed a little as it set, or has some streaks in it, indicating it just wasn’t sufficiently stirred, then yes, you can carefully melt it as indicated above, and start over with the tempering process.
Yes! Chocolate you purchase in bars is already tempered when you buy it, and you can melt and temper it again, at least up to 3 or 4 times.
I have found it easiest to temper chocolate on days that were not too humid or warm. If you live in a warm, humid climate, this can be tricky, so choose your day carefully!
A glass bowl of a size large enough that allows you to vigorously stir your chocolate is ideal. I have used plastic and ceramic bowls over the years and both can work well.
Plastic does not retain heat very well so it’s best used when you don’t need the chocolate to stay at a working temperature for too long (fine for making bark, not so great for dipping truffles).
Ceramic works as well as glass, but retains a lot of heat so you have to be extra careful not to burn the chocolate (or your hands as you remove the bowl from the microwave to stir).
If this guide for how to temper chocolate in the microwave has helped you, or if you have any questions about the process, leave a comment below and let me know!

How to Temper Chocolate in the Microwave
Ingredients
- 1 1b pure chocolate dark, milk, or white chocolate
Instructions
- Coarsely chop 3/4 of the chocolate, and very finely chop the remaining 1/4.
- In a microwave-safe bowl, add the coarsely chopped chocolate only.
- With the microwave on full power, beginning with one or two 30 second bursts, begin melting the chocolate, stirring after each burst. Continue melting in 10-15 second bursts until the chocolate is about 70% melted.
- Stir the chocolate until it is completely melted and smooth. If this is taking a very long time, give it another 5 second burst in the microwave.
- Add half of the finely chopped chocolate to the melted chocolate, and stir vigorously until it is fully melted and smooth. Continue to add chocolate, about 2 tablespoons at a time, and stirring, until you see that the chocolate is starting to take a long time to melt.
- Keep stirring the melted chocolate vigorously for about 4-5 minutes. Dip the back of a metal spoon into the chocolate, place it on the counter top and give it 4-5 minutes to set up. If the chocolate sets ups with a smooth, beautiful shine, and no streaks, it is tempered and ready to use.
- If the chocolate is not even beginning to set, keep stirring, even adding a little more finely chopped chocolate, and test again. Your chocolate is ready when it sets up hard, shiny, and streak-free in just a few minutes.


Thank you for these tips on tempering chocolate! Do you think the type of bowl is important? Sometimes when I use ceramic bowls they get super hot and stay hot for a long time, would you recommend using a plastic microwave safe bowl to temper or is it good if the bowl is retaining heat? Thank you 🙂
Hi Alex! That’s a GREAT question! I have tempered chocolate in the microwave with glass, plastic and ceramic, and although they all work well, I have settled on glass as my preferred material over the years. Plastic bowls tend not to retain heat too well, so the chocolate will cool faster in the bowl which is not ideal when doing something like dipping truffles, when you need it to stay at a working temperature for longer. On the other hand it makes no difference if you’re pouring it onto a baking sheet to make bark. Ceramic retains heat SO well that I sometimes found the bowl a little too hot to handle when taking it out to stir. Glass is the best in my opinion, but use whatever you have 🙂